Showing posts with label scenery. Show all posts

Friday 21 July 2023

Terrain is everything - Thermic Plasma Conduits - Highlights and metallics

Afternoon #WarHamFam and #WarhammerCommunity I've been #PaintingWarhammer on my Thermic Plasma Conduits. On with some VGC Sun Yellow highlights, plus some additional shading in places to create more definition/contrast in the structure of the pipes.


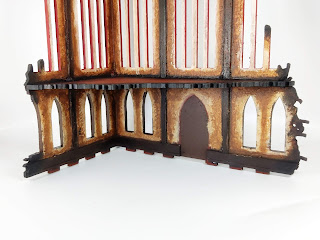
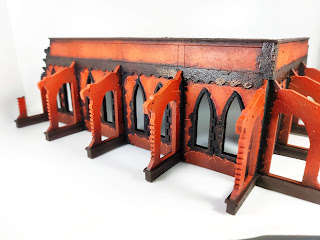
I also picked out all pipework with a VGC Gunmetal Metal drybrush, some of the canisters in red, that fits with my Servo Haulers and GSC Sentinels.


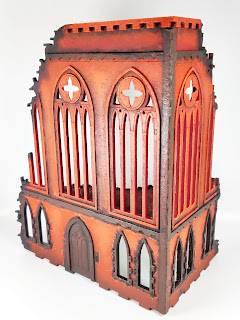
I also painted the coils, which everyone else does blue but I wanted them to follow the red insulation glass I've done perviously.


Even the 'chimney' has one and I think it ties everything together.


It does mean the plasma canisters which go in here will need to be red, when I did the one for my Crashed Aquila Lander blue, but the technology is all over the place.


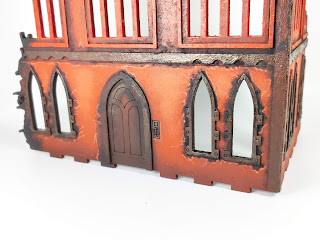
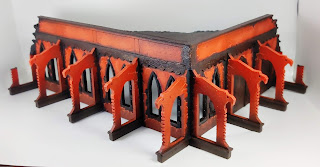
At this stage they were effectively complete, I just wanted to record them here before varnishes etc.


The smoke on the chimney added another subtle addition to the scheme.


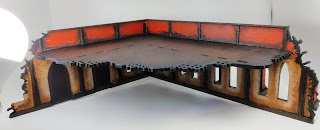
A whole lot of effort, for no real purpose, though they'll probably be in next year's Armies on Parade.


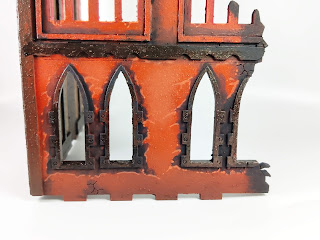
But it's about the enjoyment and satisfaction of painting something nowadays. Are they realistic? Not completely but I think they're getting more so, and much like BLESSED VERDIGRIS, rust can vary massively. What you see sometimes doesn't look real, or consistent, but that's because it's a natural process.


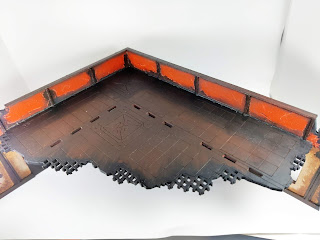
It's completely random and throw in a wholly fictional planet with unknown environmental properties and this could be 100% accurate to the conditions on Ferron Proxima. 


Super chuffed, now to varnish, photograph and move on to the next thing.


Wednesday 19 July 2023

Terrain is everything - Thermic Plasma Conduits - Rusty yellow

Afternoon #WarHamFam and #WarhammerCommunity I've been #PaintingWarhammer on my Thermic Plasma Conduits. Next up Colvin & Co. Burnt Sienna stippled and drybrushed on. 


I mean, when this stuff dries it feels like rust. 


I may have to try this as a final coat in future, rather than an intermediate application. The things is, rust is so diverse there's now reason it can't be different in the same setting.


Sure, you want consistency on the tabletop and the same techniques tie everything together. I love that, I really do, but I'm also about experimenting.


Taking those opportunities to challenge how I do things and explore different ways [like the variety in my Nurgle Blood Bowl team]. And in real life things do look different and incongruous. You don't always get colours that match or compliment each other sometimes they clash and look odd. 


I'll continue to play with that even if I know the safer option might be aesthetically more pleasing to the eye.


That said, the yellow makes them look very different.


Sponged on Colvin & Co. Gamboge as I did with my Preceptor Weapons.


Kept the rust showing through in places.


Added Valejo Game Effects Dry Rust to all the pipeworks and fans.


Also on the control unit to help break things up a bit.


I knew jumping onto these so soon after the Haemotrope Reactor would pay dividends .All the same techniques, just a few little details I'll need to pick out next, more highlights and ways to balance the weathering and rust effects.

Monday 17 July 2023

Terrain is everything - Thermic Plasma Conduits - BIG BUILD TO DONE!

Afternoon #WarHamFam and #WarhammerCommunity I've been #PaintingWarhammer OK I fooled you I did end up putting the Thermic Plasma Coduits together.


I mean it was only at the end of the Haemotrope Reactor and it was another tactic to avoid the Terminators but I was convinced I could rattle through these as all the experience on the reactor would be still fresh in my head.


Again, lots of Oxid Paste texture and red crackle paint to get them suitably weathered.


Some additional brown stippling for one tone of rust on the top.


Just adding more texture to what I'd already built up.


Different pipe.


Other side.


I had decided to make this one an upward vent. I may live to regret that it feel like I'm limited in how I can arrange these with the Reactor but we'll see.


I just wanted a little more verticality and it's decision like this that delayed getting them started int he first place.


The control unit, I've still to prime the plasma canisters that fit in the sockets.


And the control panel itself. More rust and yellow to follow.


Great Big Big Build RUSTY Stamp of Approval for the build.

Saturday 18 December 2021

Terrain is everything - TT Combat Gothic Ruins MDF kit - Red ruined walls.

Afternoon #warmongers and #warhammercommunity I've been #paintingwarhammer on my TT Combat Gothic Ruins. First up some simple first stage Red Planet BASE highlights all over - stippled/drybrushed on.


The advantage for having the same colour for your buildings as your battlefield is you have this technique and all it's colours ready to hand [although when I run out of the Home & Bargains Vermillion I'm stuffed!].


You can see I added some shading around the windows to make it look like the top rendering had fractured off round the window frames. I then added highlights to the cracks, just the same as my House Raven Imperial Knights - yet more transferrable skills!


I shaded the edges of the ruins with black - where they might have been damage by fire and smoke.


Inside I'd stippled on more Burnt Umber on the cream walls to give a grungy grimdark finish. 

On my Sanctum Imperialis I went on to add some bone highlights to tone this brown grime down, but I deliberately decided to leave this as is for a few reasons. Ordinarily I get to this stage and wish I could leave it but feel compelled to carry on painting, so for once I refused to be a slave to my compulsions. Also, it's quicker to leave it as is and as much as I like this terrain a quicker more slap-dash approach is fine.


Additionally, it would be useful to have something that didn't go all the way to the degree I did on the Sanctum Imperialis, just as a measure to compare when I do.


That's not to say I've rushed this, far from it. I thought I'd be really quick with it but I did far too much detail than I wanted to.


In my defence I always add far too much detail but I had hoped to fly through these and not worry but I think I settled somewhere inbetween, and this is just before the Blessed Verdigris was to be added!


I did discover this floor has bowed, which was quite a surprise. I think I stored it with something on top and it;s pushed it down by at least 5mm in the middle. I might look to try and weight it in the other direction.


I liked the floor like this, and probably should have left it. but there was going to be now way I couldn't add some more metallics and verdigris, so look forward to how I foolishly handle that in the next update.


Blessed Verdigris next...

Friday 19 February 2021

'nids 314 - Tyranid Void Shield Generator part 15

Afternoon #warmongers and #warhammercommunity I've finished #paintingwarhammer my #Scratchbuilt #Tyranid Void Shield Generator. All that's left is some white background shots, for those that like them, first a 360 spin


And static shots...


Not a lot to say really, as the highlights 2 post is very similar pics.


However, I was trying to add links to all 15 parts of my build and add them to my tutorials and showcase pages.


But I discovered that somewhere along the line I got my numbering convention mixed and there were 9 posts prior to these 15 that featured the VSG build.


So, 24 posts in total! That's more than the Skyshield and its 6 capillary towers and walls!


Rather than go through renumbering them all I've split it into 2 chapters in the Tutorials page, not that there's a reason for where the chapter break came in.


Anyway, it's done now, so just enjoy the rest of the pics.


Tyranid Void Shield Generator Chapter 1. part 1. | part 2. | part 3. | part 4. | part 5. | part 6. | part 7. | part 8. | part 9. |

Tyranid Void Shield Generator Chapter 2. part 1. | part 2. | part 3. | part 4. | part 5. | part 6. | part 7. | part 8. part 9. | part 10. | part 11. | part 12. | part 13. | part 14. | part 15. |