


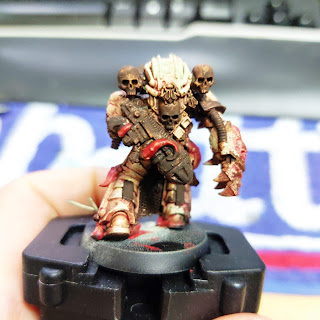
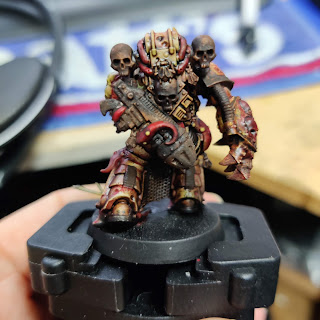
But I hadn't decided on the colour of his skin or horny bits at this stage so the benefits of the red wash on his face weren't capitalised on, next time though. I picked up Vallejo Game Effect Dry Rust for the armour banding.

It's a slightly browner Typhus Corrosion, which I think works really well. Originally I'd wanted to do the Death Guard armour as if it was stained concrete. There were some pillars in Manchester going into a canal that started black, at the base, and went through this green to tobacco yellow, that would have been cool. But I liked the idea their armour was some mottled bleached skin, that was somehow tough.
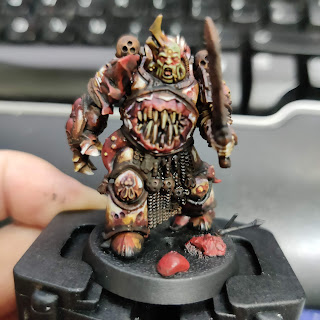
I decided on Death Guard green for his face and added more sepia washes and picked out the yellow buboes on any tentacles.
Purple and green washes in places, I was just trying add more grime and tones.
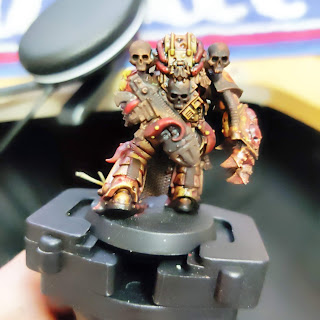
And yet MOAR washes, with Heavy Red in places and then AP Strong and Dark Tones.
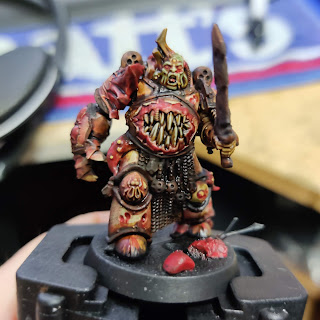
There was a little debate with myself about the plasma coils, it couldn't be blue - too pure. Orange is my Dark Angels colour and turned off it would just look like rust. Red, would be OK, but there was already red on the model and I didn't want to confuse things. I was left with two options - purple or green, I;d eventually choose green.
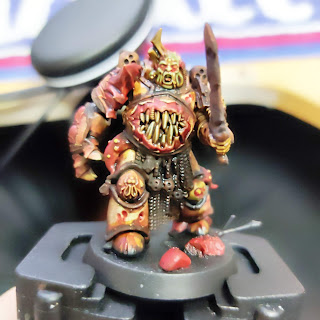
Finally, MP Cream highlights come in and in some respects the increased contrast suddenly felt like a backward step. It certainly looks more 'painted' now but I think perhaps the previous step was closer to Blanchitsu style.
Some rust and weathering powders to add and finish off the base but this is almost complete at this stage.


I had hoped this would be a quick process and aside from the red bits in the first pic was probably a couple of hours work, maybe less. That is quick for me, but it still feels longer than it should. Hopefully, it'll get quicker as I go along, I was decision making which is always time consuming. I think I will be painting these one at a time going forward. A little palette cleanser between jobs, but knowing me I'll end up batching them in some way. I've a TO DONE! post next for this, so perhaps more in depth observations on something very different for me.
No comments:
Post a Comment