Wednesday 6 August 2014

'nids part 150 - TO DONE! - Not a Pyrovore

The not a Pyrovore Biovore proxy is complete and here he is alongside his true Biovore sibling. Can you believe they've tried to model the Biovore three times and still not got it right?! You'd have thought this would have turned up in plastic by now. In truth the Pyrovore looks a lot nicer but as we know the rules are rubbish and both are quite difficult to get hold of so we make do and mend.


Still surprised how quick and easy this was to paint.


It actually turned into a completely pleasant experience, although there was an element of guilt for not painting Dark Angels but once again repeat the mantra 'go with the flow'!


Now I'll have to find a way to fit them both back in my lists, I've been dropping the second one more and more recently. It's incredibly difficult to get a 1,500pt list together nowadays, I blame Blog Wars and it's generous 1,850pt allowance.


Still, another nid figure will only add to my Armies on Parade board. I'm waiting for some essential components for that before continuing but any extra bioforms will add to the entire spectacle [just so long as I can fit them in around Dark Angel and Parade board progress].

And a top down view in case you need it.


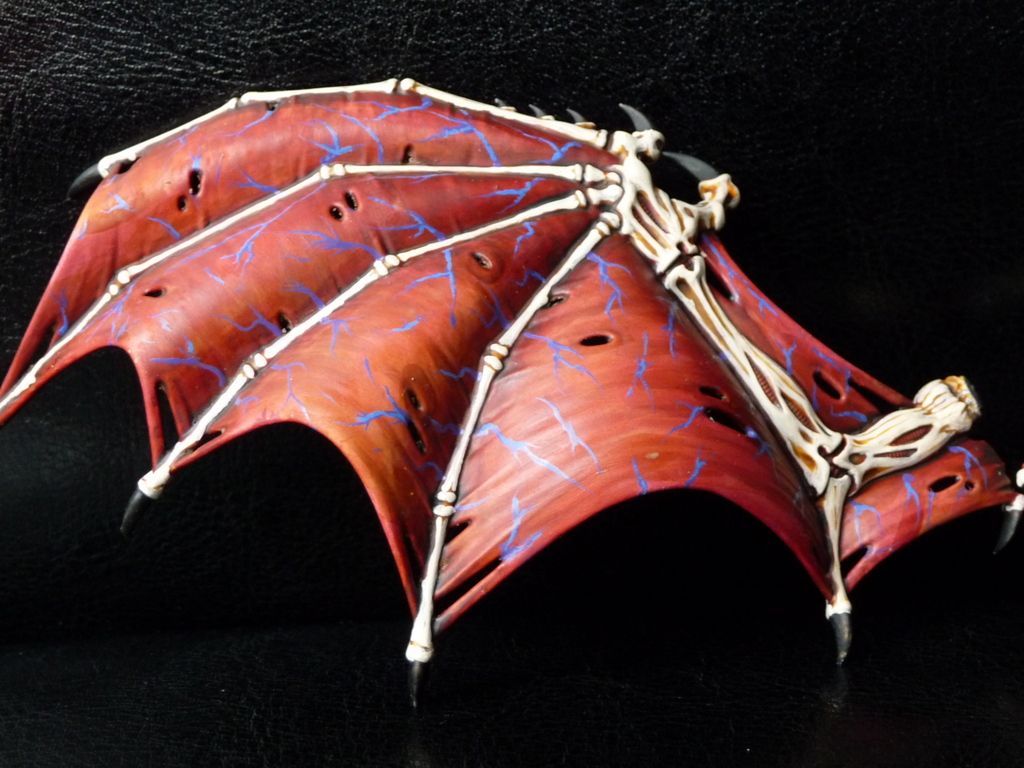
It's also interesting to see how something I painted at the very beginning of the Hive Fleet [although it has been slightly updated in the last 12 months] compares to my most recent effort - a lot darker for one thing.


I may be getting a 50mm base to mount the smaller Biovore on. I'll just glue the 40mm base to the 50mm and then blend the edges in with some Milliput so it looks like it's on a mound.


It is quite a relief though that despite being different models they are believable as the same unit, I guess that's one of the other benefits of nids - it doesn't matter what model you're using it conceivably be appropriate as another bioform of a similar size. Obviously these couldn't be Raveners but I'm sure you could convert a Ravener to bee a Biovore, starting points anyway for crazy kitbashes.


Currently this is the last nid I have in my painting schedule. I've dumped a load of Genestealers in some Dettol, I probably need to get some more as the Dettol has practically become a dilute acrylic sludge thanks to all the models that have been stripped. The Behemoth painted stealers have not been cleaned thoroughly enough so I may Fairy Power Spray them to finish it off.


However, I may do my remaining Ripper bases as my 'side order' of nids. It's not a lot to do and have little impact on my army lists but will look fun on my AoP board to have more than just my four bases. A bit more of a tide of little gribblies is amusing and gives them 'reason to be'. Granted their viability has improved in 7th but right now they have no reason to be in my 1,500pts, certainly not if I'm dropping a proven choice of a 2nd Biovore that would require roughly the same points for an unproven, over-costed, and 'on-paper' lesser unit than some of it's troop contemporaries

Big blue tick for being a naughty boy and painting yet more 'nids, now go do some Dark Angels!

Monday 4 August 2014

A freebie - JINK! and Tervigon Spawn Out markers


With Flying Monstrous Creatures using Jink for their Dive rules now it's become more important for me to keep track of what has Jinked, a couple fo times I've forgotten so it was obvious I'd make a marker to denote who has done what. So here we have eight of them, which should be enough...


Additionally I've also lost track on a couple of occassions to which Tervigon has spawned out so I decided it was high time I created a marker for this event too, six should do here but if you need more I suggest you could print it a couple of times


Just a reminder of my Patented method of constructing your own markers:
  1. Print
  2. Apply double sided tape to back
  3. Stick to mounting card [I use black card which is black all the way through, alternatively a black Sharpie or other marker will make the edges really cool looking]
  4. Carefully apply sellotape to top if you want them pseudo-laminated
  5. Cut out with craft knife/scalpel
  6. Amaze your friends and enemies with these awesome Markers
  7. Tell them to visit www.40kaddict.uk for their own free markers.
Oh, and just in case you weren't aware I've been creating free downloadable 40k markers for a number of years now, they're all available in the FREE DOWNLOADS section, because, that's right THEY'RE FREE. It's nice to see other blogs creating markers too, I'm always supportive of the effort because even if it's the same effect markers I've created, my own designs may not be something you like and someone else's might. So long as you get some use out of them, and I'm still keen to see pics of these in use [I've only seen a couple], I'm happy.

Saturday 2 August 2014

Painting Points System - I've tried to avoid it and think I've succeeded but what the hell!


Random picture to illustrate painting?!

There's a point when you blog, particularly the way I do it where you start drafting a post only to stall part way through writing. This may be because you're waiting for content to mature, to conclude the point of the post or it may be events change the whole purpose of the piece. At that point the post is stuck in limbo, what does one do with it if it never gets the pictures or the content is out-of-date? Well I'm not about to waste the time I spent writing that's for sure.

I wrote this piece about Painting Points systems and I'm a big believer in systems as the great Harry of Hill once said. I'll let you read the piece because you may find some inspiration in it for your own hobby enterprise. Afterwards I'll explain why this is no longer relevant to me, although I think there are some pretty clear indicators throughout


Dale at Realm of Warhammer has been using a Painting Points System for the last couple of years. It helps motivation and as he translates his points into £'s he can reward himself for his efforts. I'd considered this before but I've struggled to keep track of time spent on projects like the Capillary Towers, I really didn't want to add another metric to what I was doing. Additionally I tried keeping up a scoring system on theTyranidHive once but the monthly deadline came and went and I think I didn't quite meet my target and just felt depressed afterwards.


Part of me has begun to warm to the idea though. It's another facet to the addiction and I feel compelled to record what I achieved, apparently the awards aren't enough! Although I kind of like the annual review of my To Do List and it shows up quite a lot of things that have been achieved beyond the list it would be handy to know what those detours were actually worth. So, I may as well give it a try, I'm going to backdate to the beginning, or maybe even the 2012/13 list [a bit harder to work out] here's Dale's points list, in some places I'll have to add my own values in and it's also going to feel weird getting points for the likes of my Dark Angel Tactical Squad because they've been ongoing for 2-3 years but nevermind.
Basic Points: 25mm base = 1 pt.

40mm base = 2 pts.

60mm base = 5 pts.

Monstrous Creature = 10 pts.

Small Vehicle = 15 pts.

Large Vehicle = 20 pts.

Flyer = 25 pts.

Terrain Feature = 10 - 20 pts.

Superheavy Tank / Flyer = 40 - 50 pts. (depending on size)

Titan = 60 pts. + 20 pts for each weapon.


Bonus Points: Character + 2 pts.

Extra Options + 0.5 pts. per option.

Based Model + 0.5 pts. per model.

New Technique Attempted + 5 pts. (one-time bonus)

Transfers / Unit Markings + 1 pt. per unit.

Weathering (Battle Damage) + 1 pt. per unit.

Weathering (Dirt and Grime) + 1 pt. per unit.

Gore (blood and guts etc.) + 1pt. per unit.


Completed Unit + 2 pts. per unit.
Additionally I think I need to add modelling points in. I do a lot of scratchbuilding obviously. For instance lets just try and work out the cost of my Skyshield, is it a 10-20pt Terrain feature, is it two [capillary towers and landing pad]? It's certainly bigger than a Superheavy Tank so lets say 40pts to paint, each tower is based so that's another 3 points. Gore and blood everywhere [6 towers, 6 walls and the pad 13 pts]. Gloss varnish on the digestion bases, another 3 pts and a completed unit 2 pts. That gives 61 pts for painting, but what of the making? How do I measure the 24+ hours construction of the towers alone? Multiply the final number by 2?


What about kitbashes, what value should they take? Again do I double the points or do I have a scale 0.5 for a weapon/arm/head swap 1pt for a considerable kitbash? Magnetizing too - that should be valued. You see this is why I didn't want to do this...


I thought long and hard about this and came to the conclusion it was just too complicated a system for what constitutes my hobby activities. Indeed I thought I'd probably spend more time trying to keep score than actually getting work done. If I'm taking shortcuts with my WiP photographs then I don't really have the time to spend totting up what 10 bases, with flock added and blood effects on half.


I realise that if I was going to undertake such a measure it would have had to have been using my own points system with a point per single model, and extra point for kitbashing and then various multiples of points depending if it was on a 40mm base or bigger. But I still couldn't reconcile the cost/value of something like the Bastion, or the Capillary Towers so in the end I thought it better to just leave it be. Maybe this example will illustrate what I mean:
  •  I completed making and painting my Skyshield Landing Pad, this would be a Terrain Feature worth 20pts +1pt for blood, so 21pts total.
  • I painted 20 Termagants for 20pts, +10 for the bases, +4 points for completing 2 units and it's debatable whether the glow effect on the toxin sacs are 5pts for 'extra options' or 10pts for a 'gore/weathering' option I would add under FX, but even so it's a minimum of 34pts total.
  • A Tervigon, something I said I would never paint again, 10pts +0.5pts for a base, +0.5pts forextra options +1pt for the glow FX +1pt for the blood and +2pts for completing a unit 15pts total.
So, 20 Termagants is worth more in points than painting the Skyshield? That actually might be true, it was relatively quick, but no way are they worth more than twice the effort put into the Tervigon. And therein lies the problem because I just can't work out what everything is worth and agonising over the value of something is just too much hassle!

I think my annual To Do List review is probably a much better way to measure my progress so I'll leave this post and challenge everyone to consider which system suits them best to chart their progress:
  • a Painting Points System
  • an annual To Do List and review
If you're going to choose the latter then you can start now or join me on the 28th August 2014, which is my next To Do List anniversary, and create your own list for the 2014/15 hobby season.

Thursday 31 July 2014

Red Planet Basing pt2.

Over the course of the last few months I've done a lot of basing of miniatures and thought it was an opportunity to show some the process from start to finish. I've made referrence to my Red Planet Basing tutorial many times but that tutorial didn't feature much in the way of step-by-step so I'd hoped to address that deficiency with a new tutorial. In truth the pictures aren't great but it may yet be of benefit to thos ewishing to replicate the surface of Mars or Ferron Proxima itself.

To complete the process you will need a tube of Vermillion Artists Acrylic [ignore the Yellow Mid] I get mine for Home & Bargain for £1 and it's great stuff.


You will also need a bottle of docrafts Artiste craft acrylic Pumpkin flavoured erm, coloured. You'll also need various washes equivalent to the late great Devlan Mud or Badab Black, I use Army Painters range because it's the same stuff, cheaper, still available and doesn't screw up your miniatures if the batch of 'shade' is deffective.


Now there are two methods to doing these bases that should bring about the same results, heres the first one


This particular group of bike bases is made using my patented mix of 'sharp sand'. This will kill your brushes to paint as it is indeed sharp but I've still got a massive bag in the shed so I sift and graade it for a variety grain sizes. As the bases are separate I sprayed these with Red Oxide car primer.


Because the car primer is darker than starting with Vermillion I wash these with the Devlan Mud equivalent wash. You could try a thinned down paint but we all now washes are the bomb and work better but certainly on a big base or piece of terrain I would opt for a watered paint.


Once the wash is dry you drybrush with the Vermillion.


You then mix Vermillion and Pumpkin 1:1 and drubrush again.


Finally a very light drybrush of Pumkin.

Then you need to pick out individual grains with Bonewhite. Try to look for interesting ones, having a mixed grade of basing material helps here. It's always good to target those grains that are surrounded by more visible shades as the contrast between dark and Bonewhite is more effective. Be very careful not to do too much and make sur ethe individual grains are not too large. You're aiming to make the base more interesting, with a bit of variety not overshadow the model.


This base for 'Pestilence' follows the same principles - Red Oxide


Shadow wash


First highlight Vermillion.


Second highlight Vermillion/Pumpkin 1:1


Add the Bonewhite chips.


Finish off by Mechrite Red [or equivalent - 3 coats of Vallejo Heavy red] and some yellow Autumn Flock from Gale Force 9 [yeah the colours look way different!]


The alternative method of painting is usually when base and model are already attached. In this case you paint the base with Vermillion, sometime adding some water, the craft acrylic is a thick paste. Adding water helps the paint flow into the crevices in the sand, be careful though, adding water may dilute your PVA if it has not dried completely. This will result in a gloopy sandy red mess. Once the Vermillion is dry, usually overnight the proces is the same but the wash will be a Badab Black equivalent. As the base is much brightes you will need a darker wash to tone it down.


Once dry add your Highlights as before and pick out the bonewhite chips.


Add flock, usually in the cracks and crevices. Vegetation will naturally occur in these places and they will likely stick better to the PVA if it's not on open ground. This bit is fiddly but it's worth it.


Pick out any other details on the base, this Hive Node also has gloss varnish applied to the tentacles. it's a small thing, possibly unnoticed by many but I know it's there so it's worth doing.


Apologies again for the inconsistent photography. I may well do another set in good lighting with my digital camera so you have an accurate record, but not before I do my Brown Basing guide, that I used on these guys:

Tuesday 29 July 2014

Armies on Parade board 2014 - Project X continues [just a little bit]

It seems my embryonic Armies on Parade board is worthy of a few extra views. Now if I'm honest I've taken far more pictures than I'll be showing but it doesn't do to show all my cards at this point. What I will do is show you that the base is now complete and I spent a bit more time ensuring all the support struts on the back drop were properly aligned and pre-drilled for the screws.


In the end I added another couple of screws in the back instead of dowling rods, to secure the left hand wall. It takes a bit longer to put together, and there will no doubt be some DiY on the day to put all the pieces in place but a quick buzz with my electric screwdriver will have it in shape. 


So I've got the time done so far and it's about 6 hours so far [I've recorded them all on the back of the pieces, just don't have them to hand], still seems a lot for not much progress but again, it's the measuring. What is disturbing is the wife has already cottoned onto the project. I'd dismantled everything and it was in the same space occupied as the insulation foam used in the construction so I didn't think she'd notice in the garage, particularly as she'd been at work for most of the days I've been constructing. However she went and asked me "what are those wood things in the garage?" To which I had to confess - "a new display board". 

One issue is I'll be starting shaping the walls next and to make it look effective I need to add as well as take away to each fascia but if I add then storage is more difficult as added elements will 'stand proud' instead of allowing it to lie flat. This then is the next stumbling block to progress and why there are only two pics to show. This did give me the impetus to finish off the 'not Pyrovore' and press on with the Dark Vengeance Tactical Squad so I'll take whatever motivation I get in those directions, even if it's borne from a creative block.


Additionally I've been thinking some of the other decorations and there are a number of technical hurdles I need to overcome. Once again I'm thinking of transparency effects and once again I'm struggling to reconcile how to achieve them, and to do so cost effectively. I've since found out that there is no National Armies on Parade event. It will NOT be part of the new Warhammerfest, so although I think AoP is about taking part I had always hoped to go on to the Nationals and not win, but perhaps take one of the 2nd or 3rd places.

Of course with that not happening there is less incentive to go completely OTT but there are still some things I want to explore. I just have to weigh up whether solving them is entertainment for me or is the specific effect I'm hoping to achieve too much hassle and ultimately resort to what I'm familiar with [you see you don't need to use the phrase 'comfort zone'] and just sculpt clay. If only there was a transparent medium with same properties as clay, or even Milliput - a maleable epoxy resin instead of a liquid one...

Sunday 27 July 2014

Dark Angels - Watcher in the Dark

A lot of my hesitancy about painting some of the more fun characters is my problem with cloaks. So far anything cloth has come out a bit pants, which would be good if I was painting pants I suppose but in this case I'm not and it sucks. I really wanted to do dark cloaks but given my lack of success I decided to just go with the prescribed GW colours of Bonewhite because I know I can get that look down.
So I painted this little guys cloak in one sitting, and his little red sash.


I'm really glad I added some liquid Green Stuff to the edge of that cloak, so it looks like it's draping over the side of the boulder he's standing on.


Shadows may be a little OTT but I'm quite chuffed.


Wings on the Lion Helm are going to be red, tie it in a little with the base, need to do the eyes and the Dark Angels green on the helm and his boot. 


I'm amazed I spent an entire evening on a model is worth practically zero points in my army, but it was fun to do and you go with the flow, right? Then again he could be the Watcher holding the Perfidious Relic, what's that 20, 30pts? Not a total waste of time ;) 

Friday 25 July 2014

Dark Angels - Watcher in the Dark and his mates

Micro blog alert - this is my Watcher in the Dark conversion for Azrael, holding the Lion Helm.


All the Tactical Marines from Dark Vengeance, plus Rogue Trader Devastators and some assorted characters.


In particular my Azrael conversion from the Dark Vengeance Chapter Master in the background and Asmodai, who I got because I loved the idea of his two melee weapons - the Crozius giving +2 [or is it +1 Strength] and the Blades of reason causing Instant Death, with two assault weapons that's 3 attacks ont he charge! Then after ordering him I only went and found out he can only choose one of those weapons to fight with, which seems a bit rubbish but that's my 'nid hat on.


Also my Techmarine is on the go, because apparently every Dark Angel force should have one.


Foolishly though I've bought Asmodai, when I could have used my Limited Edition Chaplain and I got a Techmarine when I already have a Rogue Trader one, I love the model though, although the back-pack is a bit of a nightmare. I do think though, given I have a number of chaplains that a Dark Angel force could use them as their Veteran squad, half a dozen Chaplains on the rampage would look cool, and I have my tiny RT Chaplain hiding out in one of the pictures too.