Friday 10 August 2012

1000pt battle report - nids Vs Marines [6th Edition]

My third 6th Edition game and it was round to PeteB's for our second showdown. Obviously still a lot to learn for both of us. I've had the advantage of the full rules but I haven't actually been reading them religiously so it wasn't too much of an advantage.

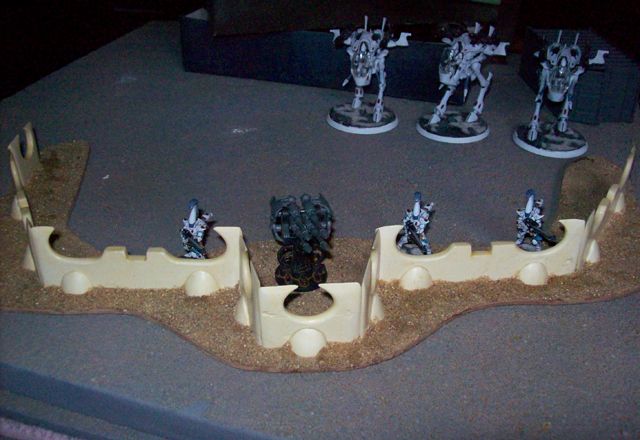
PeteB had a tactical squad split in two, 8 man assault squad, razorback, Stormfinch, terminator squad with Librarian and an aegis defence line with quad gun. I had the usual suspects Hive Guard, Tervigon, Trygon, Prime, 11 Hormagaunt, 10 Devgaunts, 6 Stealers and Broodlord with Iron Arm and Warp Speed. My Warlord [Prime] had the ability to allow an extra Run dice or a reroll for any unit within 12", PeteB had something that meant my Reserve roll had -1. As you can see it was Vanguard strike deployment with the Emperor's Will 'Eternal War' Mission - my hive node objective behind the Tervigon and PeteB's ammo cache next to his Rhino behind the Aegis Defence Line.


PeteB got first turn, did some shooting, took out four Devgaunts  and a Hormagaunt and may have put a wound on the Prime. The Hive Guard targetted the only things in range - the assault marines and killed 2. My infiltrated stealers, who'd lost two to first turn fire leapt from the ruins intent on mayhem.


The main horde surged forwards, the Tervigon spawned 15 and pooped out with three 5's. The Termagants surrounded my objective.


The marines hunkered down behind their defences, firing at anything that moved.


The Stormfinch burst onto the battlefield in a roar, blasting away at the Tervigon, taking a wound. The Terminators teleported onto the battlefield but Servitor XXIV misjudged their co-ordinates and for fear they would materialise inside a cliff face emergency aborted the teleport and returned them to their strike cruiser. Meanwhile the assault marines took to the skies on their jump packs and fired into the oncoming brood of Hormagaunts. The Razorback reveresed, it's tactical squad disembarking to take up position next to the objective. Most of the fire was directed at the Genestealers killing all and leaving the Broodlord with 2 wounds.


The Hormagaunts and Prime charged down the Assault Marines but the gaunts couldn't survive the withering overwatch fire. The Prime was eager to avange their demise through rending claws and Bonewswords but forgot how to use them and failed to wound a single marine.


The Broodlord channeled the power of the warp, adding 2 attacks to his 5 on the charge, his +1 adrenal strength taking out the sergeant and perhaps 1 other marine [but his rending claws failed to bite], not before he suffered another overwatch wound.


The Devgaunts scuttled thought the ruined Administratum building. The Hive Guard were picked off by the hovering Stormfinch, not before they'd both managed to shoot it while flying but failing to penetrate or glance it's armour.


The Devgaunts charged to help the Tyranid Prime in combat, their combined weight too much but for a single marine.


The Trygon had been busy slithering forwards to support the Broodlord [who'd managed to kill another marine, not throigh rending and with 3 attacks from Warp Speed], suffering wounds on the way but bashing down the defence line as it went.


The Stormfinch had hovered to score wounds on the Trygon and having spent a turn chastising Servitor XXIV the Terminator squad appeared in blinding light and sharp crack.


The Tervigon moved back to add support to the termagants on the objective.


Storm Bolter and Assault Cannon fire did serious damage to the Termagant numbers but the Tervigon's cluster spines hit, wounded and killed 2 of the terminators in return.


The last of the Assault marines was killed but not before the power fist wielding sergeant hammered the Prime into the dirt. The Devgaunts scuttled off to try and take on the Terminators.


Finely the dormant Ymgarls emerged from hibernation in the ruins and headed to support the Broodlord who'd finally managed with 7 attacks to kill the last two Marines, but still no rends in in three rounds of combat and 21 dice rolls! The Trygon ploughed into the Razorback...


four Smash attacks tearing it apart and suffering two massive explosions that failed to wound the towering beast.


More firing from the Devgaunts, Termagants and Tervigon managed to kill two more Terminators but the repositioned Stormfinch was desperate to gun down the remaining gribblies.


To finally silence the destructive Quad Gun the tervigon tore it to pieces like confetti.


A wound was put on the Librarian, who promptly charged along with the remaining terminator into the brood.


The Devgaunts and Tervigon joined the fray, the Tervigon graciously accepting the challenge of the Librarian but resulting in stalemate.


The Ymgarls and Trygon high tailed it back to the fight but couldn't reach the battle before the end of the game.


We rolled one xtra turn of combat where the Tervigon squished the Librarian but the terminator remained.

End result was a win for me. PeteB got shodachi [first blood] and was in my delpoyment zone and killed my Warlord [3kp]. He contested my objective but I had his, and was in his deployment zone [4kp]. So I won, narrowly. Still an awful lot to learn, so many 'modifiers' and I've still got to remember existing ones like instinctive behaviour - the Trygon was out of Synapse a few times and I forgot to roll. Not too much of a big thing but when rage gives you +2 on the attacks its worth remembering.


Thursday 9 August 2012

A freebie - Victory Point markers


A quick freebie seeing as how happy I am thanks to Team GB doing so well in the Olympathon. A set of counters [above] to print and stick to card, perhaps with some sellotape laminate before you slice and dice them out.


Of course you can always do a little tally chart to see who's got what but I think this is nicer. As for individual VPs for killing units - you can always use the free wound markers...


Usual step-by-step:
  1. Print
  2. Apply double sided tape to back
  3. Stick to mounting card
  4. Carefully apply sellotape to top if you want them pseudo-laminated
  5. Cut out with craft knife/scalpel
  6. Amaze your friends and enemies with these cards
  7. Tell them to visit 40kaddict.blogspot.com for their own free markers.
Enjoy.

Wednesday 8 August 2012

Terrain is everything - Eldar defence line


Just been reading a battle report by hyv3mynd at synaps3 and what's of particular interest is his opponent's - Grubnards - home made Eldar Aegis Defence Line and Quad Gun. I was hoping this sort of thing would take off and as it's one of the first examples I've seen since the rules came in I had to share it immediately.

All the construction details are here. So nip along, see how easy it is and have a go. Not so sure about fixing the layout of the line, but to each their own and the finished article is really cool but also handy for illustrating a simple technique to create almost any organic wraithbone structure. I'll definitely think hard about what I could do. My own Tyranid Defence Line and Quad gun is in progress I'll update as and when I can fit it in.


25,000pt Apocalypse battle [5th Edition] - part 2


Once again due to the unique way of preparing these posts in advance I have stumbled on a new problem. I still have battle reports for 5th Edition while I'm exploring new 6th Editon so I hope you don't mind having to straddle the two rule-sets to enjoy what went down. For one you've no choice and for two I'm not about to dump the content. This was my final 5th Edition battle, a 25,000pt Apocalypse War, before 5th went off and  expired quietly in a corner somewhere.

Here come the Stealers! Both units of Adrenal Stealers came on and the Ymgarls woke from dormancy in the building complex top left. The Stealers and the broodlords multi-assaulted the three Whirlwinds and the deathstrike missile launcher, the Ymgarls went for the Techpriest and the bombard.


The Doom of Malantai emerged from the spore pod and sucked the life out of varied bikers and guardsmen but quite a few managed their cover saves from this life sucking psychic ability [don't even get me started on that nonsense!]


In the lower corner the bulk of the nids suddenly faced a group of outflanking White Scars but the Trygon looked on hungrily, meanwhile the IG heavy Weapons team are no longer a threat. The Tervigon must have spawned the 10 Termagants next to it.


The stealers survey their carnage, all three Whirlwinds wrecked or blown to smithereens, the Deathstrike Missile Launcher gone as was the Bombard and Techpriest, allowing the Ymgarls to consolidate back into the terrain they'd lain dormant in. BOOM!


The Trygon licked it's lips having eaten all the White Scars bikers with the Hive Tyrant but their frenzied attack caught the attention of the Imperial Guard tanks.


The Leman Russ trained its weapons on the Hive Tyrant and blasted it out of existence. Meanwhile the Devgaunts were rooted out of the ruins and more assault marines came on and charged the Termagants and Tervigon. My disrupter beacon continued to play merry havoc with all deep striking units, not least Belial and his attendant Deathwing who ended up perched on the first story of a building in the middle of the battlefield with nothing to shoot and nowhere to go.


In retaliation for the death of the Hive Tyrant the Trygon smashed the Leman Russ to pieces while the Hive Guard shot their Impaler Cannons round corners to destroy one land Speeder and wing another.


The Trygon looked on hungry for it's next target.


The Termagants were reduced down to three and thee Tervigon was on four wounds


While the Hive Guard and Biovore continued to take cover from the ruins safe in their ability to fire indirectly.


The battle in full flow, you can just make out Belials Deathwing on the building middle left above the yellow tape measure. Also of note is the White Scar Drop Pod dead centre of the board sandwiched between the ruin and the Fortress of Redemption. This catastrophic miscalculation due to disruptor beacon interference had essentially car parked the entire Imperial Guard frontal assault which was aiming to drive through this choke point. I was beginning to feel extremely mean about my asset at this point. One other point to make is the missing Warlord Carapace, don't worry it was OK, just kept falling off and it was deemed safer to leave it off.


And here comes the pain, Vendettas swooped in offloading dedicated verteran Xeno purge teams with their many flamers incinerated every Genestealer in sight around the two wrecked Whirlwinds and bruning the Ymgarls out of their hibernation spots.


And that was it for me, time to leave. I have to say this was the most fun Apocalypse game I've ever had. My little force did a lot of damage and went out with a blaze of glory. The fact outflankers will no longer be able to do damage in the way my Stealer just decimated the back field is sad but what a finale! Not to mention the giddy fun but eventual apologetic annoyance my disruptor beacon made to the entire game. What a blast!

Tuesday 7 August 2012

'nids part 47 - Superquick update on my Tervigon

I know this is just one pic but I spent a good while on the head and although it's not complete I'm really happy with it. The Mechrite Red , and its highlights, really adds something to the richness of the figure that the liver colouring [that ends up brown after the washes] really doesn't bring. Add to that the acid green toxin elements on the tongue and I'm loving this. Even the glow effect from the green adds smoky clouds to the tongue spike. 

Sadly my chitinous feathering is a bit sloppy in places, not up to the standard I would hope but on these big creatures I like to do a third highlight so I might be able to cover the mistakes with more detail.


And just to remind you where I was at...


I'm loving doing this, it's a real labour of love and I'm also trying to get the Hive Guard done as well which is slowing progress. The Chitin on the body is a rather daunting prospect but I will try and dig in and have a bash piece by piece so I don't go mad. So many times you read about nid painters getting sick of chitin. I don't mind it, except in large areas. 

Two other points of note is that the Tervigon has become a new MVP in the nid arsenal, thanks to the new Psychic disciplines so whatever it takes I will be making this the true centrepiece of my army, which is a shame for his home made older [but smaller] sibling. Secondly, due to painting it piece by piece I have resorted to wearing rubber gloves to paint. It does help reduce the amount of oils I'm depositing on the model, which given how greasy my phone gets is probably far more than you would expect. Also there's a certain satisfaction and businesslike approach to snapping those blue gloves on every time I'm about to 'get down with ma bitch' ;)


Monday 6 August 2012

'nids part 46 - Nu Tervigon updates

Amongst all the 6th Edition and Warhammer World madness you may recall I ordered a Tervigon [and hoped to get it delivered and painted in time for WW but that was not the case]. Well it did arrive a while back, here's the unboxing [I don't buy too much new GW stuff so excuse the indulgement*, then again this whole blog is an indulgement* and you're still with me].


This is quite a big box, nearly twice as deep as it needs to be for the sprues within...


Multiple Tyrannofex weapons, I may sell these or try and use them in Tyranid terrain/Tyranid versions of Imperial Fortifications.


Tervigon torso and egg sacks.


Legs, heads and limbs.


I'm pretty much painting this piece by piece. I'd read it was the best approach, can't say it's the quickest but it may well achieve the best results. So far the base colours are down with the Sepia and Devlan Mud Wash. I did have a 'wonderful' moment where I knocked the pot of Sepia paint over, spilling it down a folder, onto the floor. I spent a great deal of time trying to put the paint back in the bottle instead of just using it to continue washing the figure. Still the job got done and the end mess wasn't as bad as it could have been.


The head, I much prefer the Tyranofex head but it looks like it would get in the way of the birthing sacs for the Tervigon.


Now I want to try and achieve a semi-transparent look to the birthing sac. I've added the 'liver' effect to the sacs and some green bulges too. I didn't want to be a slave to the GW idea of smaller green bulges but the fun I've been having with the extra green elements made me keen to go ahead anyway.


OK, I have to admit there's some weird things going on visually here. These pics seem to make the egg sac look really cool [in my opinion]. from these pics I would be happy to leave this as is with their almost watercolour-esque finish. However, in reality I was less than impressed and wanted something a little more 'angry' and red looking.


Enter thinned Mechrite Red, which is certainly more livid. However the pictures again fail to capture the fact it does look better than without the red.


BUT, it also looks like I've lost a lot of the textures created through the two washes and the thinned liver colour.


I tried to capture the look in better lighting and this certainly shows that it's a much better colour but still lacking in depth.


But the other side which was untouched has a a variety of tones I'm convinced I will lose. My only recourse is to continue on with the Mechrite Red, afterall there's no undo in in painting, but I will be using much thinner red and hoping to allow the tones created so far to show through. Perhaps if I'd have done the bonewhite highlights too I might have a better idea how this was going to turn out.


One other area of note is that the Mechrite Red was done over a couple of sittings at my local GW. Despite keeping it in a plastic bag in a box, so any friction was against shiny plastic, not the mild abrasive cardboard in the box quite a few areas of relief, Termagant crests, Fleshborer barrels were scuffed down to their white primer. I'm pretty sure two coats of varnish will be needed on this and I'll probably gloss varnish the sacs too,


* I know I should use 'indulgence' instead of indulgement but just indulge me.