Showing posts with label man cave. Show all posts

Wednesday 2 September 2015

40kaddict Towers - Almost there.


When I was ordering the shed I was advised to paint it to protect it from rot. The recommended product was Protek Royal Exterior Wood Finish I was kind of sceptical as this was £60 for a 5 litre tin but I managed to find it at that link for £45 delivered, even so how much would 5l cover?


Well it seems quite a lot. So far I've painted the shed twice [with the left end wall 3 times] and I've still got about 25% of the tin left. So I've no doubt 5 litre tin would paint this 10' x 6' shed three times over.


Now the opacity isn't compltely solid, the colour gets stronger each successive coat and you can still see the wood through this end after three coats. I'll probably be doing four coats on this end and side leaving the back and right side on two. They're not as visible and less exposed to I expect them to receive less weathering as the back is covered by a hedge and the right is sheltered by the second shed. 


However, I'll monitor the situation over the next year or so and should I feel the need I may paint it with an exterior house paint just to bulk it out, it's much cheaper and again it doesn't have to match perfectly, particularly the back, but for now this will do.


Incidentally the colour of choice was Cornish Cream, whicc is another [tenuous] link to my past in the four years I spent at university in Cornwall. The other shed in the garden is black/dark oak but I thought this would be too imposing to be dark, whereas this is quite bright I think it does evoke a beach hut feeling, so I'm quite chuffed.


I'm just waiting on the electrician now and opportunity in the weather to finsih off my tin of paint.

Tuesday 25 August 2015

40kaddict Towers - Painting TO DONE!

This is where I found myself thanks to the mix of Magnolias as you can see the walls are a very different colour to those on the ceiling. So It was another purchase of paint, this time a 10 litre tub from Screwfix, which was fun getting it home on the train.


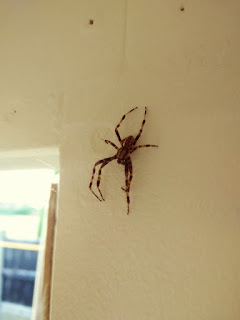
The onyl problem being the squatter I'd acquired in the corner of the shed, but I evicted him and started the painting.


My initial fear was this new Magnolia was 'Peaches and Cream' to go with the cream of muchroom and butter cream.


It had a distinctly pink hue to it but it dried really quick and ended up just a fraction paler and less yellow than the original B&Q magnolia.

I whipped round the entire interior. There'd been a number of reviews online about the paint, most positive, some older ones less so but some claimed it was even suitable as a one coat which I think it just about managed, clearly covering up the two tints of Magnolia I'd used.


The end result was much more unified and consistent. The only problem areas are the corners where the cutting in hasn't quite been as opaque as I'd like but I've done enough. With still the outside ot paint I'm not doing another inside coat. For all I know it could be suceptible to mould in the Winter, in which case I'll need to coat it with anti-mould paint  making any further coats redundant.


However, my evicted squatter returned, perhaps it's a good omen for the bugs?


So another Red Stamp of Approval, whilst I still can:

Friday 21 August 2015

40kaddict Towers - plastic magnolias

"The individual man is transitory, but the pulse of life and of growth goes on after he is gone, buried under a wreath of magnolia leaves." Apprently, but magnolia is what I had sufficient quantities of in the garage, hopfeully for two coats. This was a big value brand bucket that we used int he hall and landing and frankly I wasn;t happy with the results, every time we try and wipes the walls the paint comes off. However, I'm less likely to smear the walls with jam, of pencil makrs so hopefully it'll eb alright, unless of course the shed ends up prone to damp...


What I've done in these pics is cover all the pencil marks I made to indicate where internal wooden batons were. I had doubts the paint would cover them up so I thought an initial coat would help the successive coats hide any markings.


Obviously you can still see those initial coats now the first roller coat went on. I was quickly reminded that the very best way to use a roller is on a pole, it's so much quicker and easier. I've also noticed recently that the joints in my fingers and hands have become really sore and using a roller would have been a nightmare without using a pole.


First coat is done although I'm a little concerned there isn't enough to do a full second coat.


It was about an hour and a half all in to get to this stage.


And the door doesn't look too bad either.


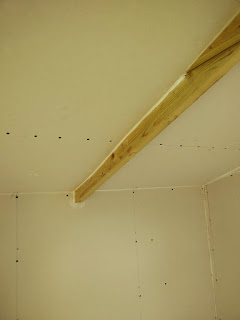
Now I contemplated painting the central beam but it just seemed unnecessary but if I reconsider I may stain it the same colour as the teak, add some continuity to the interior.


And the view from the otuside. Just the second coat and I can get the electrics sorted.


Wednesday 19 August 2015

40kaddict Towers - "There is always one moment in childhood when the door opens and lets the future in."

As Rob Hill was disappointed to see the edge of the door I can now reveal the entireframe I've made. Once again I've applied some dubious carpentry skills to get this done but it's all in one piece now so perfect it might not be but functional it is.


You can see here I used some angled corner brackets, these alowwn the frame to be joined to the existing internal frame, then when I get the teak panel on I will screw through the frame into the door and that will hold it more rigid.


The door closes neat and tidy with hardly any gap round the frame.


There are two 10mm strips on the inside frames, I may add some further strips to that to bulk it out and face the raw plaster edges and 35-40mm of the internal door frame. And onece it's painted draft exluder foam strip will also help with insulating it.


Once I'd got the frame sorted and trimmed the teak panel I screwed it in place to see how well it fit and it came out pretty well. No doubt some will wonder if it'll remain in it's current colour or be painted over, for the time being it'll stay untouched, however odd it looks when the shed is complete.


Now it was time to put the insulation in and I maybe did a little too much in places, what do you think?


I think this oblique view might suggest there is too much insulation in here. Unlike the walls which were 50mm deep with 150mm insulation squashed into it the door frame is only 38mm deep!


However I persevered and managed to get the facing panel on in one piece. The screws are a bit ugly and I randomly only got 20 so it bulges in places but I spent another £6.50 on all the hardware for the door so it's racking up the cost. The door also struggled to close. Once the insulation adjusted the shape of the facing panel I had to then shave the left hand side to fit in the frame. I had a little hand plane that did the job but it was a little frustrating to have made it fit and then had to adjust it again.


I also installed a bolt, this keeps the door perfectly closed, as tightly as possible. It'll be even more effective when the draft foam goes in. I'd actually looked at a deadpolt, which would have been nice but with how well this simple solution works I'm glad I didn't throw in something I have no experience doing, just so I can get on ad complete it.


It's maybe difficult to tell fromthis view but it's the best I could manage to ilustrate just how much the facing panel bulges with the barely contained insulation. In particular around the bolt you should be able to see it cinched in like a waist where the bolt is screwed into the internal frame. I have to admire the teak paneling for it's flexibility. It's amasing how it's seemed to stretch over it. I could add soem other screws to secure it more to the inner frame but I think it'd just be distracting.


So it does the job, the door opens and closes, hopefully as it expands/contracts over time it won't be a problem. I'm sure I recall things usually expand in heat and contract in cold and this was done on a hot day so fingers crossed I don't try and open it only for it to be jammed shut thanks to the weather! I'm hoping it can only contract, not expand. Now, onto painting

Monday 17 August 2015

40kaddict Towers - Seal of approval

I somehow set two posts scheduled on the same day so I'm a little behind but =with the boards all done it was time to seal up any gaps. I used 2.5 tubes of decorators caulk on it but I’m convinced the expansion/contraction of the shed will probably crack it to pieces.


I'd also tidied up all the windows, if you look at the two pictures below you'll see the one on the left was with the plasterboard and I didn't like the open cut window frame.


So I was going to buy some wooden strips to cap the inside frame but remembered I had some old hardboard/MDF sliding doors for my sons old bed [actually the one before last] so I've had these in the garage for about 4 years but I was using them for basing terrain. Anyway I trimmed these to fit and faced all the insides of the window frames.


The windows look really tidy now.


It took a couple of sessions with the caulk as some gaps were bigger than I'd have liked. I had planned to put strips of plasterboard in to bridge the gaps but I couldn't be bothered in the end, which I'll no doubt live to regret.


This was the biggest gap but it all smoothed over fine in the end. With the sealing done it's
  • painting the interior, 
  • insulating the door, 
  • painting the exterior,
  • electrics
  • moving in


For the door I finally got the facing panel to double skin it. This is a piece of teak panelling, previously this was part of a whole wall seciton in my parents dining room. All my childhood this was on the wall and only now as my Mum redecorates has it been removed. So I nipped round and cut it to size, a quick slash with a Stanley knife and this splits nearly as good as plasterboard.


It was too big to fit in the car but it's incredibly light, if just a little awkward so I walked it back home and then came back for the car. It's well worth it if just for saving a little bit of nostalgia for me.

Saturday 15 August 2015

40kaddict Towers - Boarding TO DONE!

I nipped out at lunch, got the train from Manchester Piccadilly to Mauldeth Road Station and right next door is a B&Q, and if my train hadn't have been 8 minutes late I'd have got the next train back. As it was I watched it leave the station as I left the store with my bag of screws. Still I got to walk to Levenshulme station and Ingress on the way. And with my screws at home I was able to put up the window board. The plan was to show the insulation too but I got carried away wanting to get on.


I'd even measured and cut the two apex wedges yesterday, I was busy! So this one was screwed in place over the already installed Earthwool.


and so did it's twin on the right hand side.


I measured up the centre-piece, installed the insulation, forgot the double batons then screwed them in place.


And cut and installed the board. The final piece of plasterboard was really fussy to cut so I could get this shape and


The two back wall apex pieces. I nearly cocked up big time too as I initially measure the wedge completely wrong but measure twice cut once. With so much riding on these three pieces out of my last board I had to get it right and these pieces were super snug fits when they finally went in.


So the boarding is done, I did a little more work on the door but the next step will be gap filling and I'll be getting some MDF and trimming it to just face some of the edges on the windows as the bare plaster offends me, even when painted. But despite everything I got his part of the build done. Just those bits, then I can paint it and get the electrician in to power it up and then I can shift all my stuff across. Then I have to paint the outside and look at the back room, luckily no sounds have been heard in the ceiling. So I'm treating myself to a red stamp of approval for work so far.