

I was then able to remove a wooden chest, some shelving units and my oversized computer desk/storage system. I had ordered new carpet tiles - easy to install, relatively cheap £20 for the 24 I needed and durable, perfect for my Herman Miller Mirra 2 office chair to roll around on.


I had wanted carpet, but couldn't find a good deal, this patchwork offcuts from two previous carpets in the house had served me well but I did not know what their condition was. I had a number of rugs on top that had offered more protection and warmth but they'd started to perish and so I'd convinced myself the carpet would be beyond saving. In truth it might have been OK, but I had the carpet tiles now.


I built a wooden frame and put down some weed supressing fabric. I've seen it used in shed wall linings [something I foolishly didn't do in mine, goodness know what's happening behind the plasterboard and glasswool insulation] as a breathable membrane. As I had some I thought I'd put it down.

I debated the best position for that cross beam, where the 6mm plywood sheet would rest and figured the additional support would be better under my chair rather than towards the back wall.

I was sure the insulation board, frame and plywood would be strong enough but that additional solid wood should prevent any sinkage. So much of this was straightforward and simple, although there wasn't a single section that measured the same. Operating the 'measure twice, cut once' approach just seemed to drag on and concerns about my back ended up with so much kneeling that I was exhausted and my knees were so painful, even with knee pads.

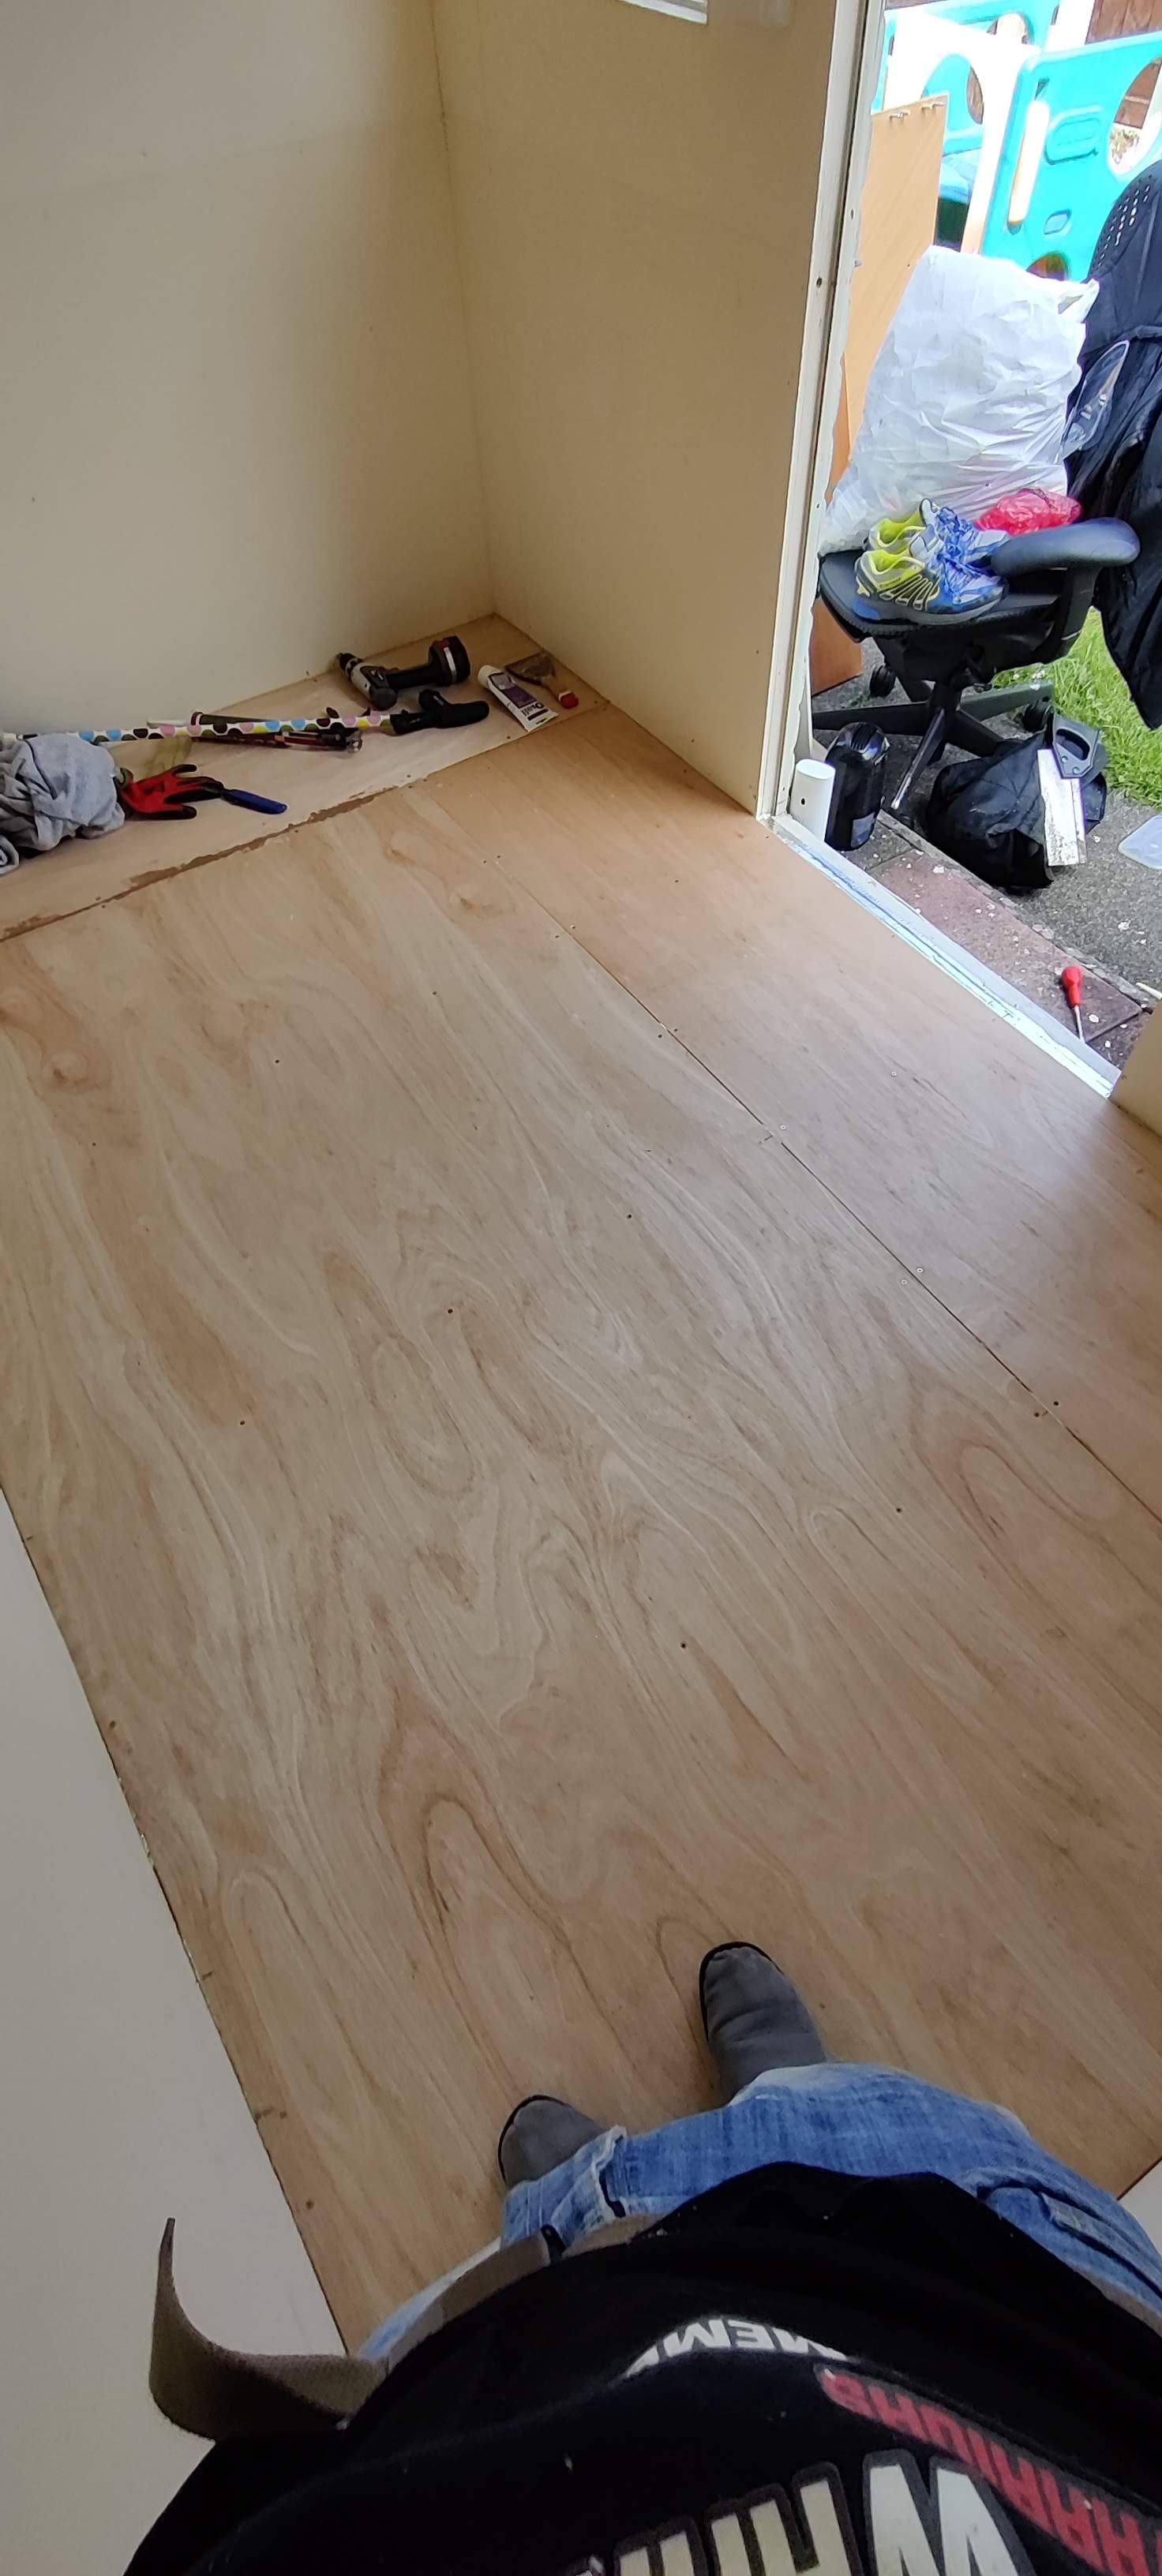
The weather came in and it started to rain, so all the desk, chair and shelves had to come back inside with the plywood down on the floor for the evening. I was pleased at my progress but a little disappointed. I'd bought a tin of anti-mould paint years ago and wanted to paint the bottom half of the walls, just for added peace of mind. I haven't really had a mould problem since I got the dehumidifier, but even so that would make me feel better. Despite the cramped interior and my fatigue I managed to get a coat of paint on the walls. It looked like cream chees when it went on, it had been in storage for 5 years afterall.


The next morning I got in there early and gave it a second coat. Having more room in the tin to shake meant it went on like any satin varnish, it looked awful at first but has a great finish, except for protecting all the scuffs and bumps the wall has suffered in the last 7 years. I then went about sealing everything up with aluminium foil. I'm not sure if it makes a difference but it looked cool.

I used two tubes of no more nails under the plywood and also counter sunk screws to ensure maximum strength and no squeaky floor boards. I didn't want the plywood shifting and creaking but the shed expands and contracts with heat, cold and moisture so who knows what will happen.

I tried sealing in the joints between the plywood boards too but it was just bit of faffing. It was quite the challenge to cut those two strips. I tried a Stanley knife for one and my Dremel for the other. Both were knackering, but I got there in the end.
I then fit the carpet tiles, using a spray adhesive. I'd watched some videos on how to do it and seen how you cut them to fit the wall but didn't quite understand why you did it that way. Having glued the 2nd to last piece down from my first row and went about cutting the final piece I THEN understood why you do it that way - lesson learned.

Except it wasn't, because I'd glued down the second to last tiles in the first and second columns before I realised I needed to apply the same approach and to the final corner piece too! Oh my that was a head scratcher. Regardless, the tiles went down and I even ended up with 3 spare, which was slightly annoying as because these were recycled from an office space I'd actually used 3 slightly damage ones that would run along the back wall, unseen, under the desk and shelves.


You'd never see them, but I knew. I just had to put it out of my mind and start putting stuff back in. The weather got better at least, which made thing easier to deal with but I was going to have to be organised and try to get rid of some of the huge amounts of things I'd hoarded.


Like these Citadel inks I'll be putting on ebay.

I organised all my shelves and used small labels on all the boxes to help me find the things that were in them. Figure boxes on the bottom - they're plastic and aluminium so better in corners where damp and mould likes to originate. That shelf is about 5" off the ground though which allows some air circulation. Preventing these micro-climates is another approach I believe has helped keep me mould free for 7 years and something I will continue with. The ability to check the bottom walls at a glance, to spot any changes early, is also good practice in this environment.


OK, so after everything got back in it hardly looks any different and I'll admit there is some 'surface debris' and a variety of things I still haven't organised but this is a significant improvement to how it was before, both for hobbying and working from home. My work situation is in a state of flux but any working from home will benefit from this upgrade.

Whether it is warmer in the winter has still to be seen. I've been able to put my fan on the middle shelving unit, which when turned on manages to reduce the temperature by 2 degrees, because it's blowing the hot stuffy air at the apex of the ceiling down. I hope it will be able to do a similar job in the winter circulating the warm air that sits above waist height and the insulated floor doesn't bleed heat the way it did when it was just 12mm thick board and a couple of carpets. Finger's crossed this keeps the shed viable for another 7 years.
A month or so on and things are doing OK. The plywood floor is doing fine, although the no more nails wasn't quite as effective as I'd hoped - the boards do squeak a bit but despite the small amount of flexing it feels otherwise stable and solid. The carpet tiles are great and it's super easy to move around on my office chair. No cold days to speak of but we've had warm days, including the hottest in UK history [we're so screwed in future years]. I was able to mitigate some of the heat during the day with the fan but it did eventually get up to 34-36 degrees. 32 is manageable but those temps are too much. When my feet started getting warm - it's a problem. Anyway, more to think about regarding cooling in the future. Other than that I'm really pleased.
No comments:
Post a Comment