Friday 3 February 2017

Dark Angels - Deathwing Knights - METAL!

Quick post. These guys just really don't fit into my schedule but I wanted to crack on with them somehow. Luckily they're just base coats so I thought I could find some time in my lunch just to add some Warplock Bronze.

 It is incredibly untidy, I'm hoping it'll all get neatened up as I go along.
 Reds next on all the Ferron stone Crux Terminatus and their Storm Shields.

I also did these two guys and then it'll be the next highlights on the bronze and washes.

They'll probably go into hiatus again after that but I just need to keep chipping away at them so one day I look up and realise I've reached the home straight without realising


Then it should be a simple push and they'll be done.


The 'Eavy Metal Storm Shieldsfeature grey stone work behind they warrior monk relief. I'll obviously be doing them Ferron Red, but all the wings and the warrior monk on the shield will be picked out in the standard colours. It'll be a bit of a departure for me, I could have just as easily done it all weathered bronze. Bronzing it would have been the sensible choice and helped reduce the palette of colours for consistency but this way is the challenge and they deserve a little extra effort too.

Moving on...

Wednesday 1 February 2017

Dark Angels - Drop Pod[s], Pod 1 numbering

Despite feeling confident to leave pod 1 well enough alone I felt the urge to add numbers. The original plan was awesome massive numbers on the door but I threw that idea out the window when the chapter markings looked alright as is. So instead it was numbers on the top fins, but how to make them consistent? Decals were the obvious choice but aside from not having enough vehicle decals to do all five fins I know I can paint that gothic swirly number 5, it's just it tends not to be consistent size wise. So I created a tiny stencil [without the line up the middle]. It took me two goes to cut it out of paper without destroying it.


I managed to do all five of the fins but you can see by the last pic [actually the 5th fin] it was becoming less effective. I'm not sure if this was due to application or dampness in the stencil but I definitely could have taken it down a notch so I didn't go quite as rough as it turned out.


But not to worry, because with the 5 in place I easily neatened it up, which was the plan all along. Ordinarily I'd have pencilled it in first but again it;s about being consistent. I also went round with some Caliban Green on the edge to neaten up any overspill.


Not the same 5 but each number did have subsequent pure white highlights. The end result is consistent across all the fins but hindsight I think it would look much better as a white circle with green 5 in the middle, although I'm sure the 5 would have to be smaller for it to fit and I doubt the stencil would be possible at such scale, extremely difficult to cut at the least.


Anyway, this is what I used, cutting out the five on the top row, although the actually fin shape and measurements are not correct so I had to fudge it a bit in positioning.
 I now have to decide if I'm doing the company symbol on the opposite side of each fin, by which I mean I have [annoyingly] decided to paint the company symbol, I just need a circle stamp on it at the correct size before I then fill it in.


Meanwhile Pod 2 got some love with the door edges orange in just two coats. I now need to do some extra shading and final green highlights.


Monday 30 January 2017

Dark Angels - Drop Pod[s], Pod 1 weathering

I'd had the opportunity to get a good few hours concerted effort in resolving the edges on the doors but moreover I was happy with the result. However, the process wasn't without a new issue in overspill from the orange getting on the green outside of the doors, not to worry though as the doors were to receive some weathering that would potentially hide all my sins [until some Interrogator Chaplain tortured them out of me for his little black pearl].


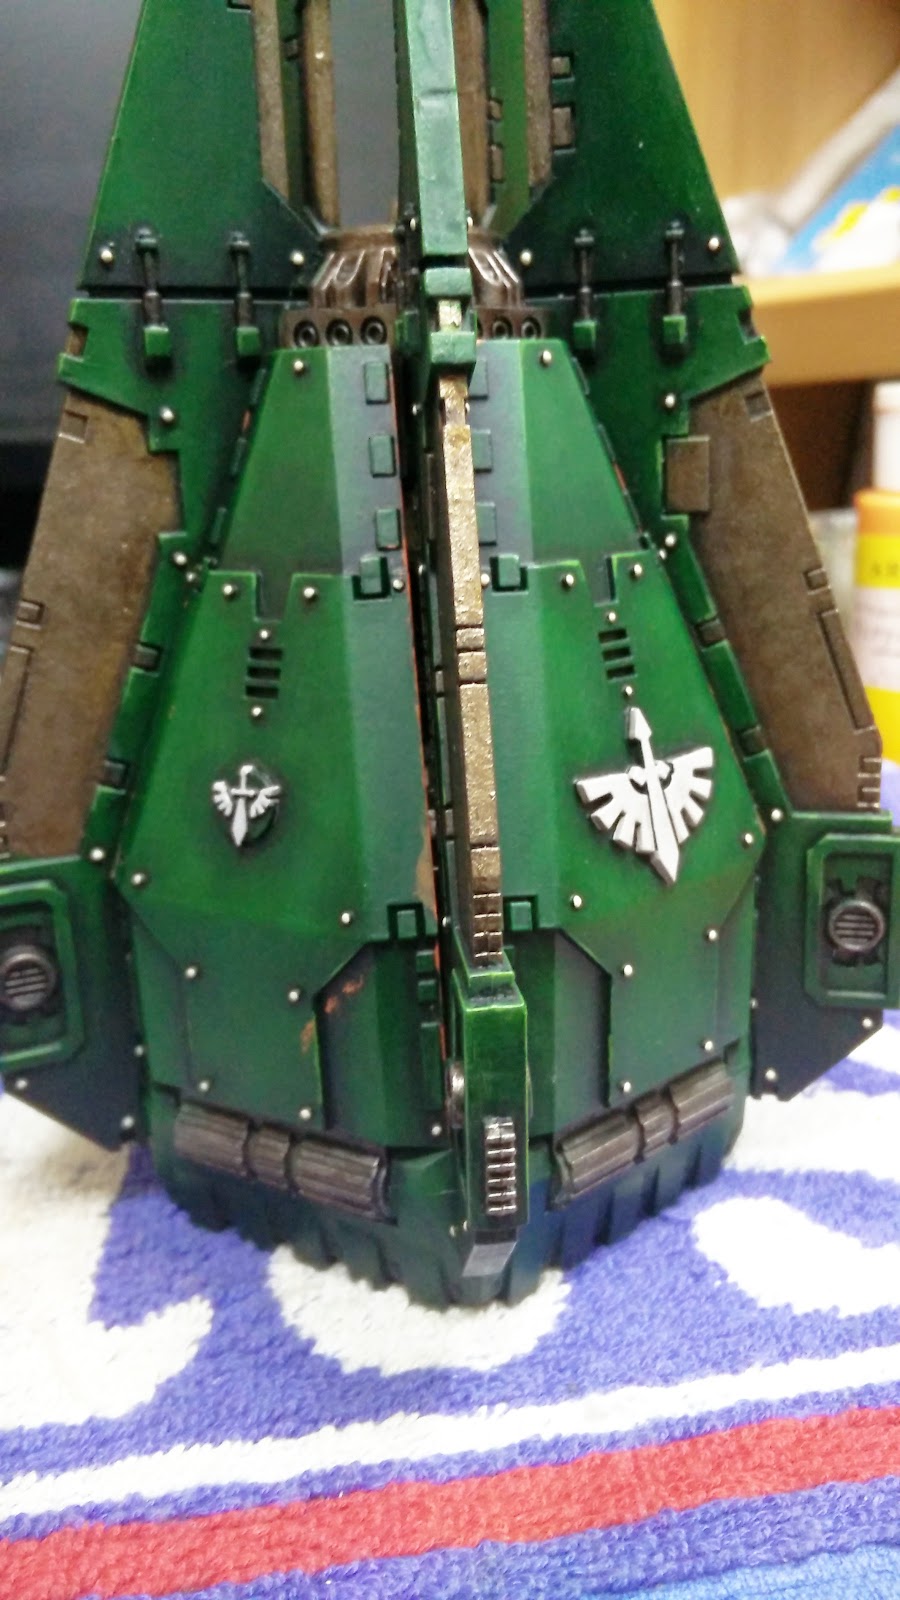
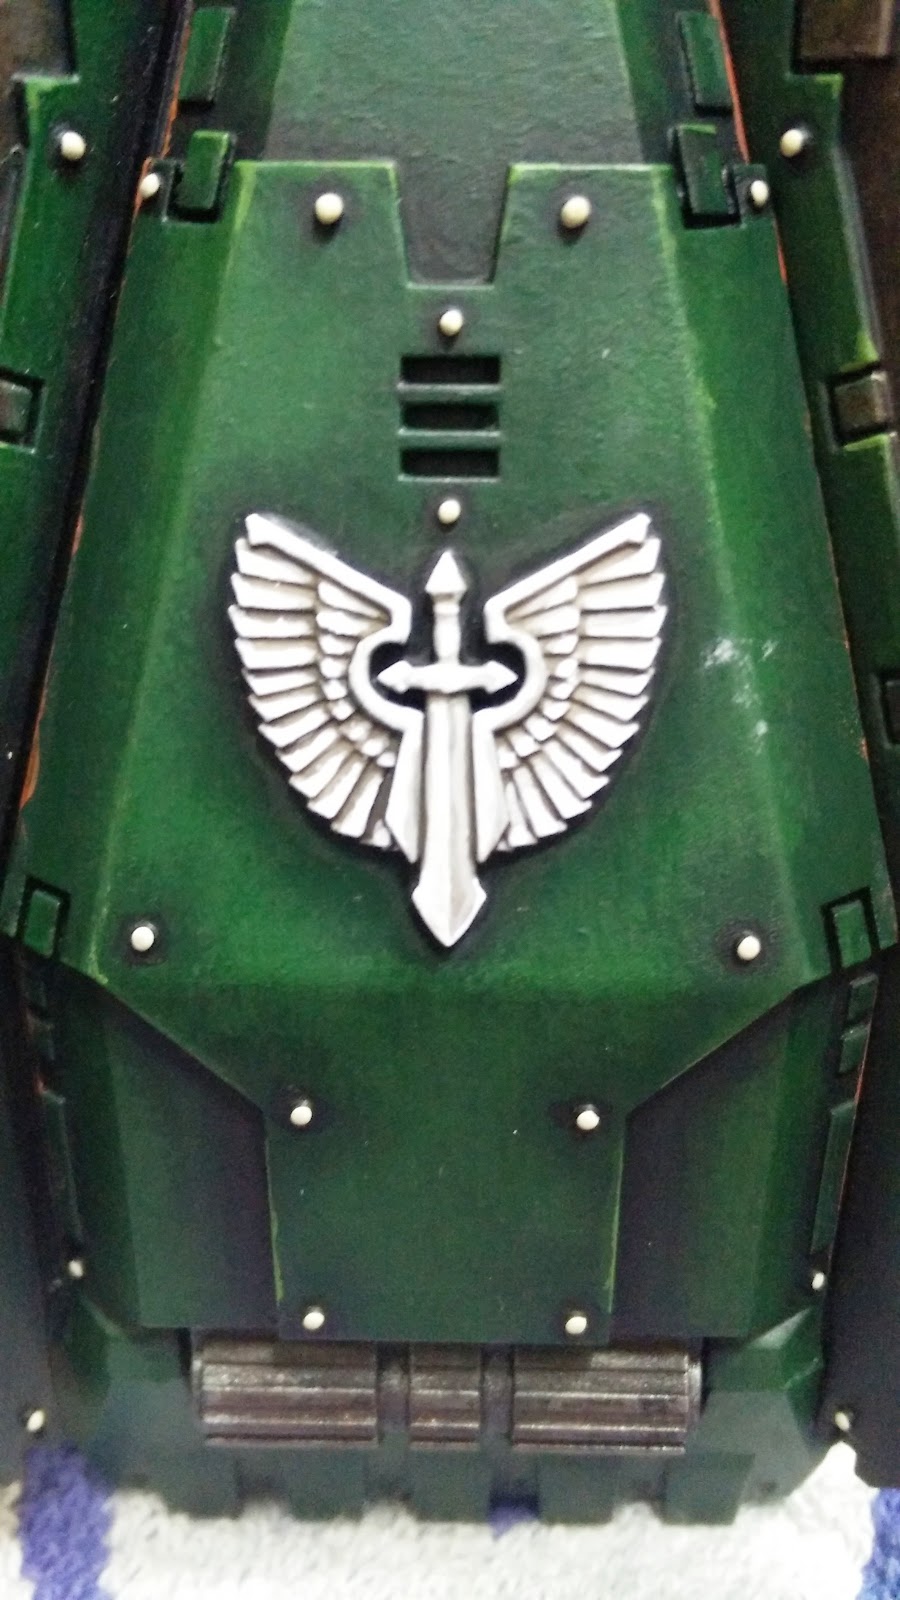
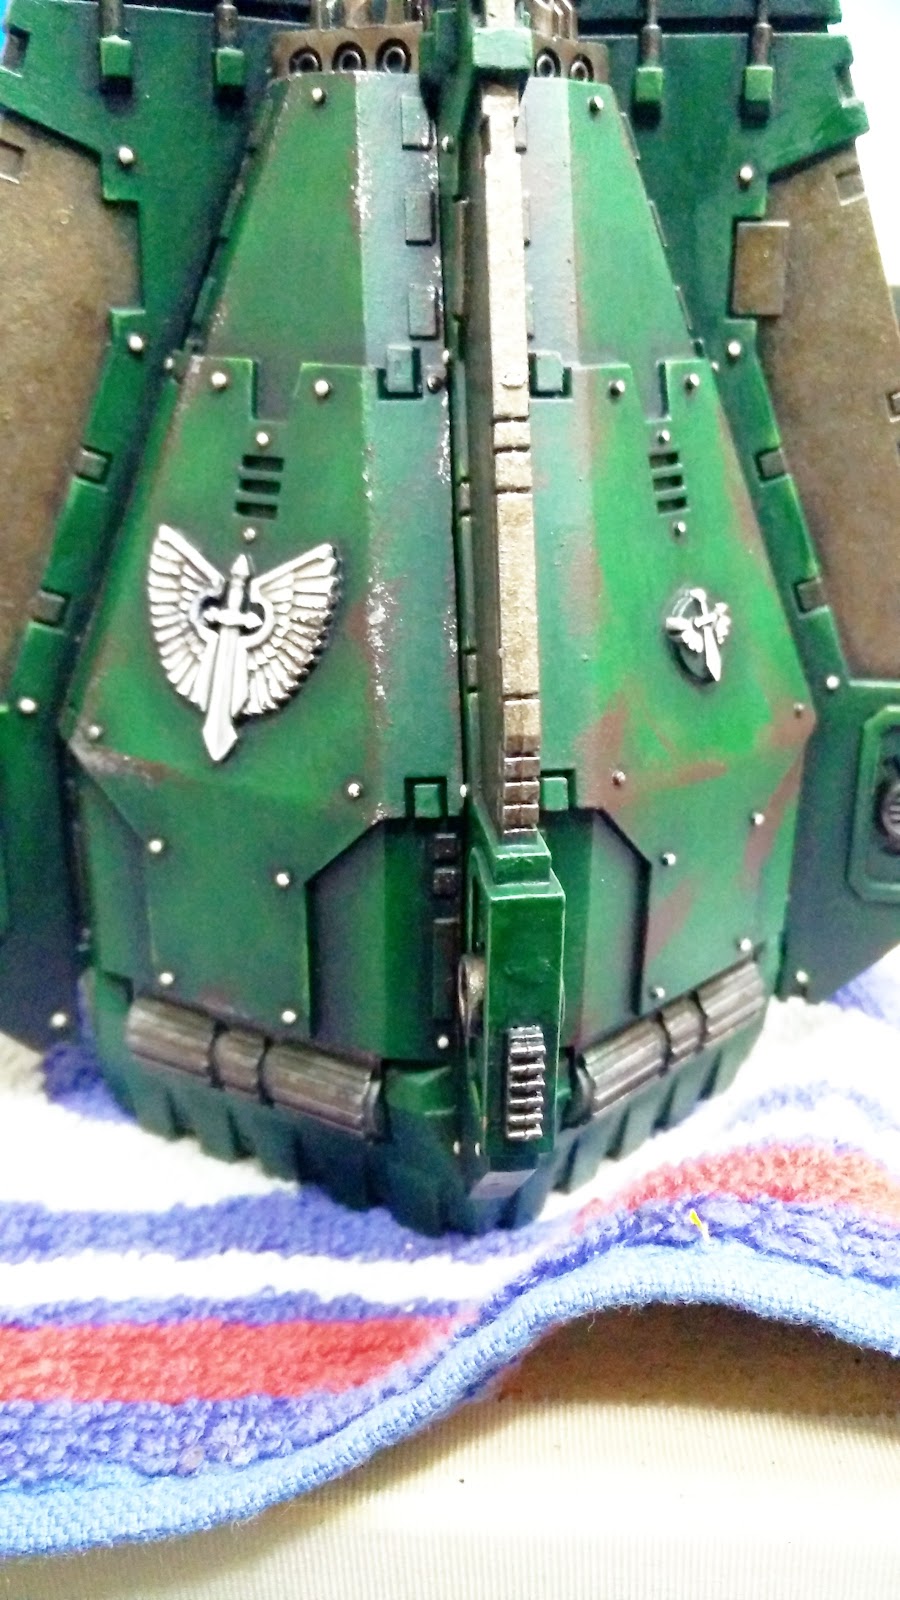
In the mean time I also finished marking out the symbols on the sides, really quite pleased with the results, just Valejo Stonewall Grey, Army Painter Strong Tone [Agrax], Stonewall Grey and white. Obviously the rivets had also been done, I think I counted 165 are on each pod, add in the 150 holes on each door and it really is the repetition that can kill you with a pod. Regardless you'll notice some additional splodges of paint that got caught on the doors. Once again not to worry as the weathering would cover these up.


Sponge and Rhinox Hide as per Duncan's advice. I tried to be a little bit economical with it this time [compared to the damage on my Aquila Lander], only really catching the edges of the door.


I think both the Aquila and Euronymous suffered from too much weathering, Euronymous I fluff-excused the Aquila made a little more sense as it had crashed afterall but both seemed a little busy and had to be salvaged in one way or another to make me happy with it.


Interestingly the Dark Angel Codex features some painted miniatures that are clearly done at a 'tabletop' standard as opposed to the 'Eavy Metal team standard. As much as I approve of them showcasing a standard that's achievable by all in the Codex I was determined to do something better than the weathering on this at the very least.


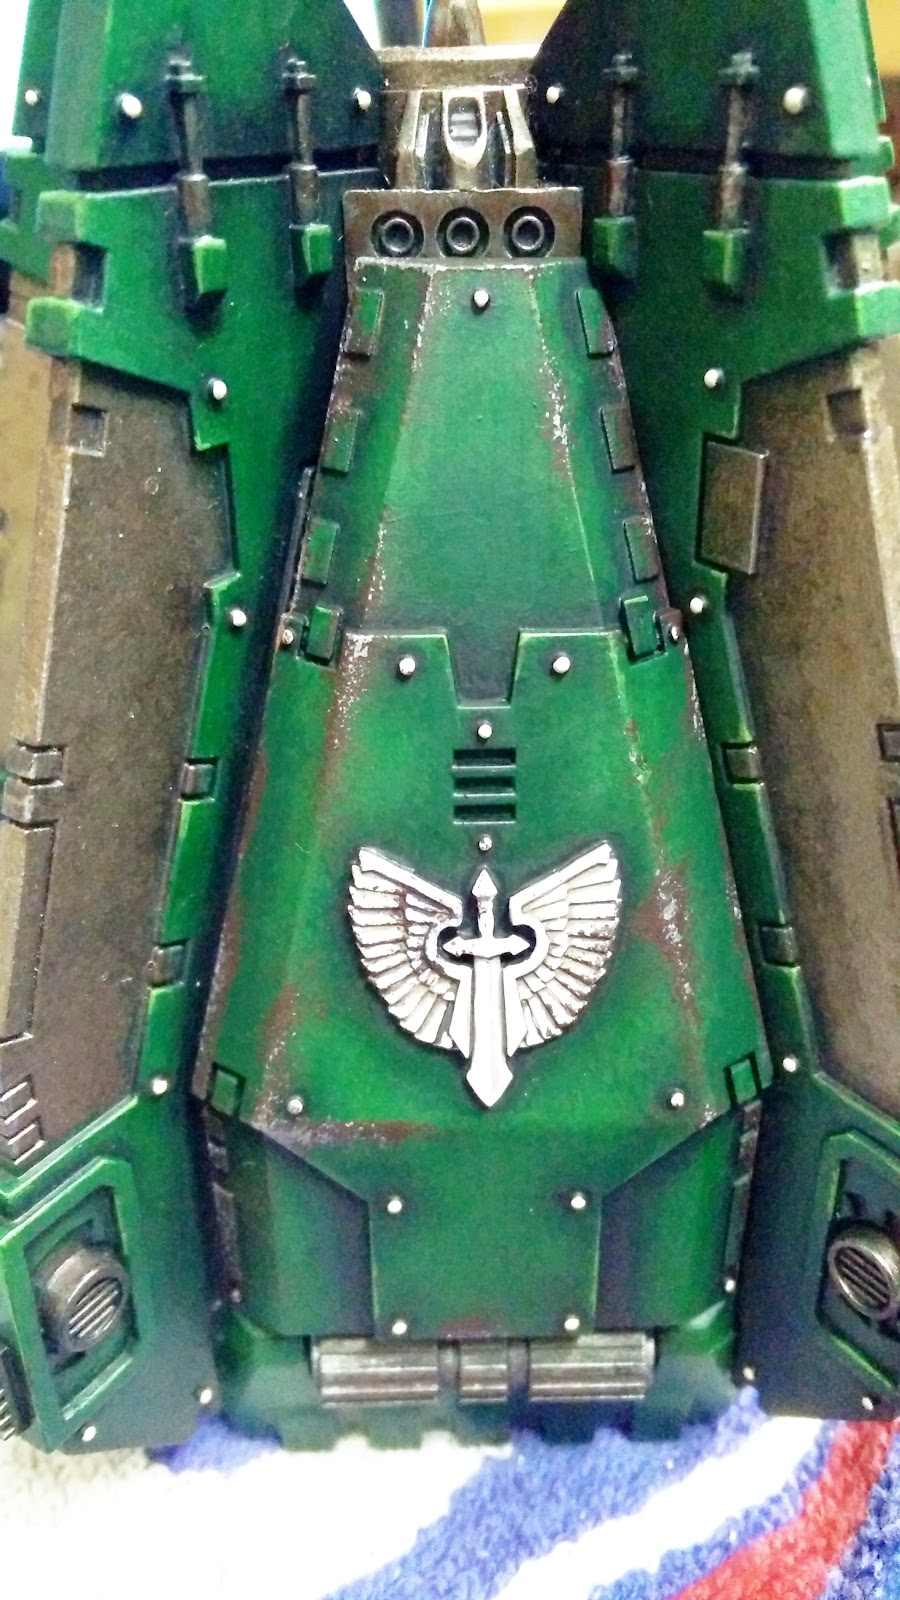
So here's my first attempt with the sponge and Gun Metal on the left door.


And then I continued round the model, note where I covered up those paint smudges.


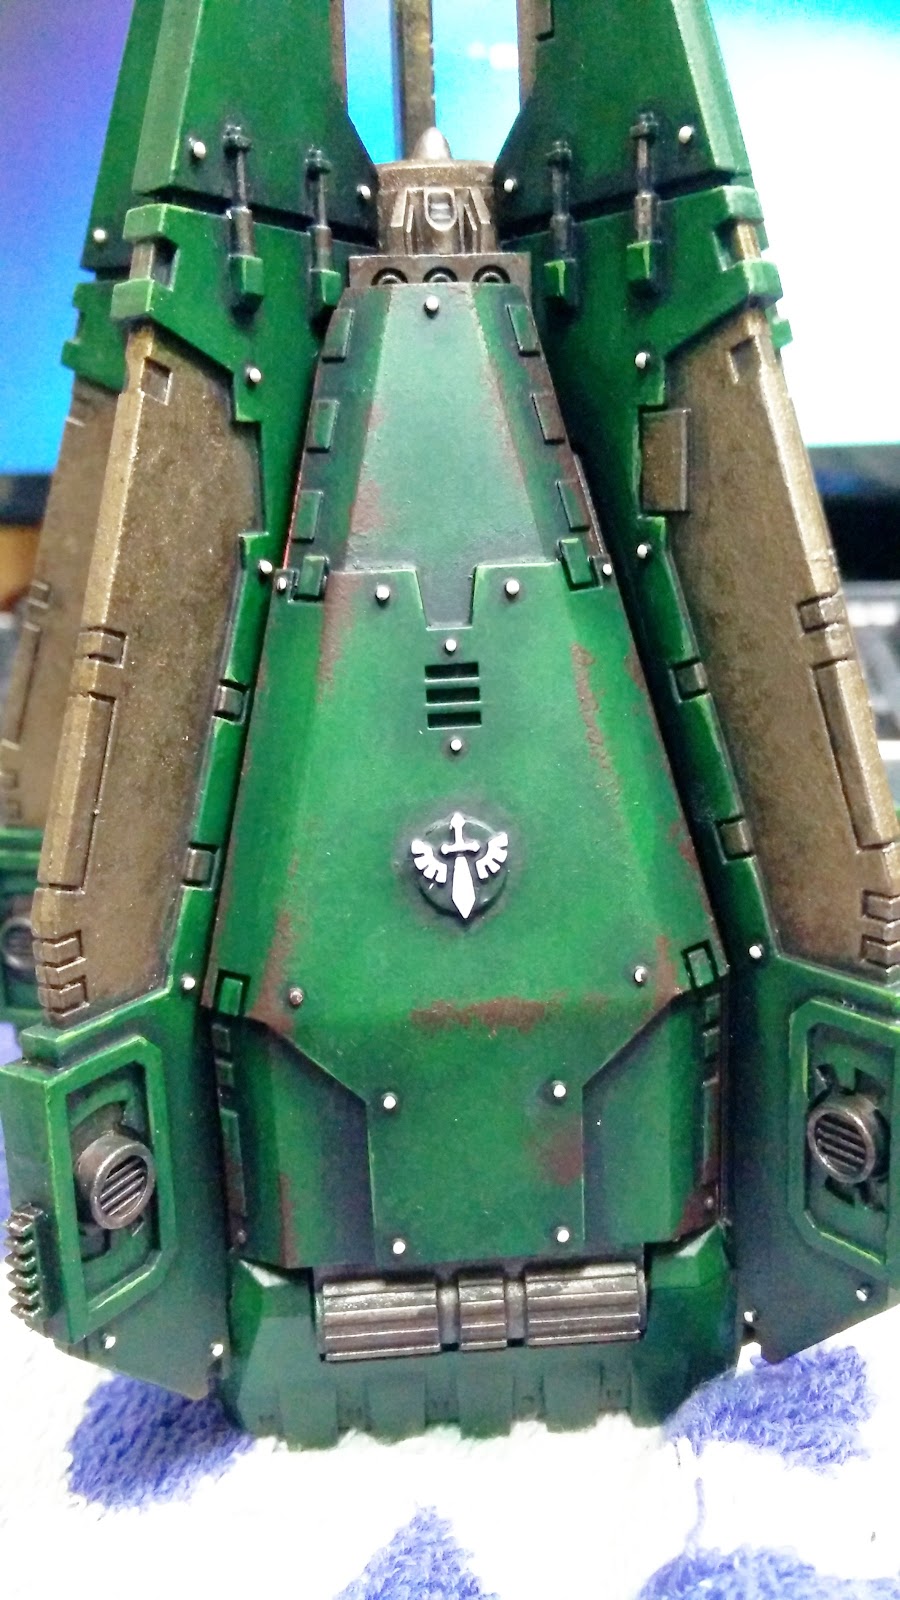
I added a subsequent wash of Strong Tone, just to make it less clean and unrealistic. I didn't go as far as I did with the Aquila and add Typhus Corrosion and then Strong Tone to blend it in as I thought the results were OK by themselves.


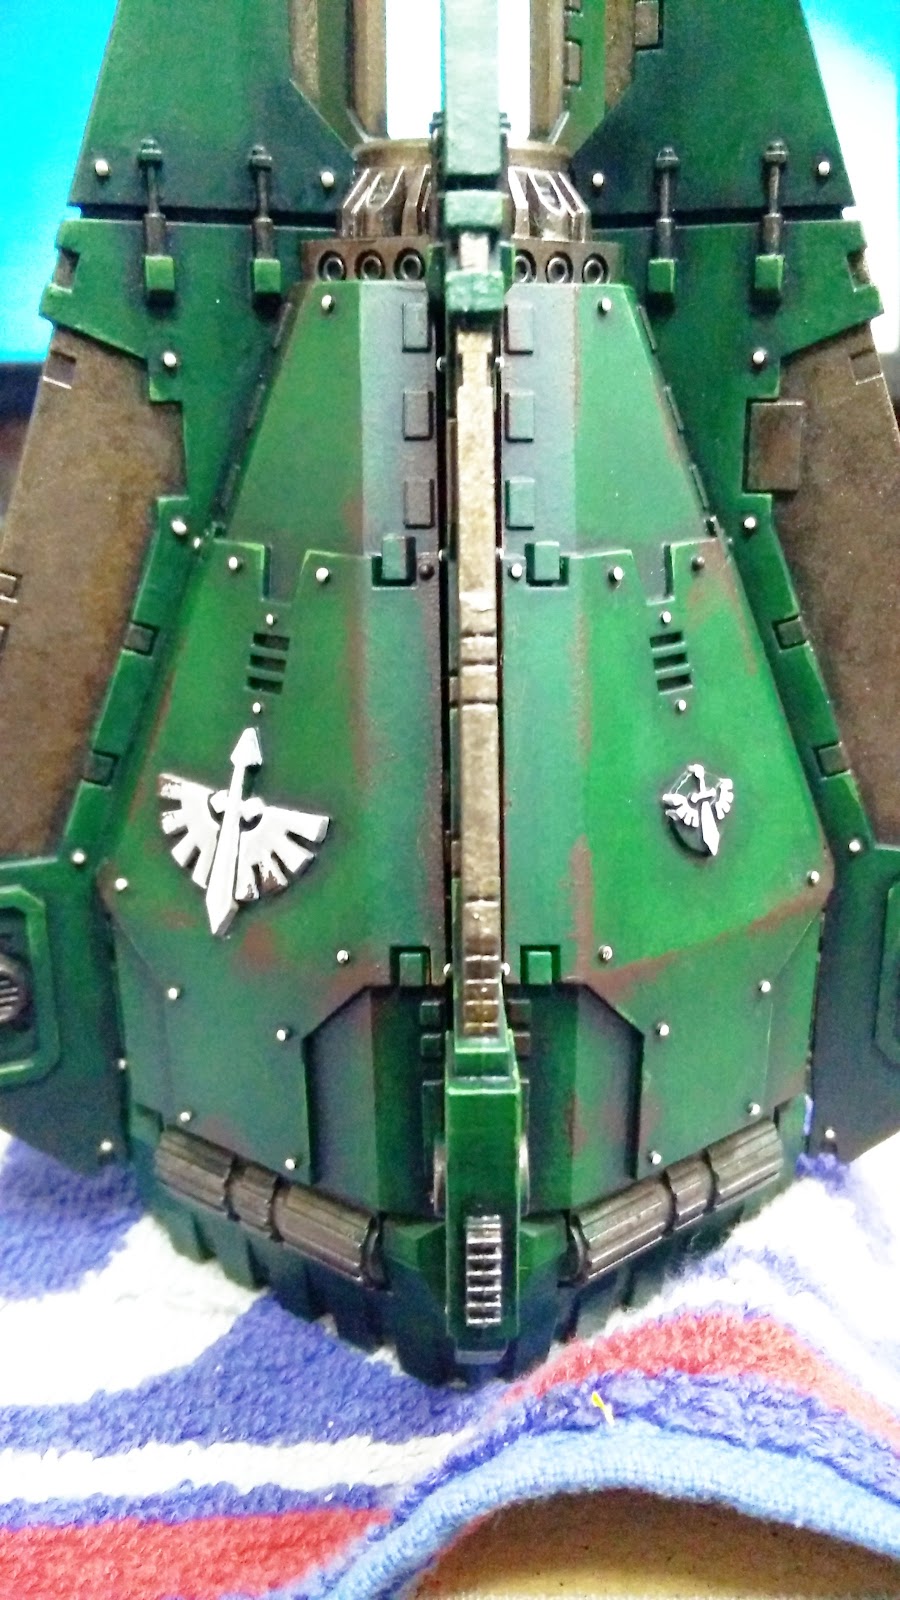
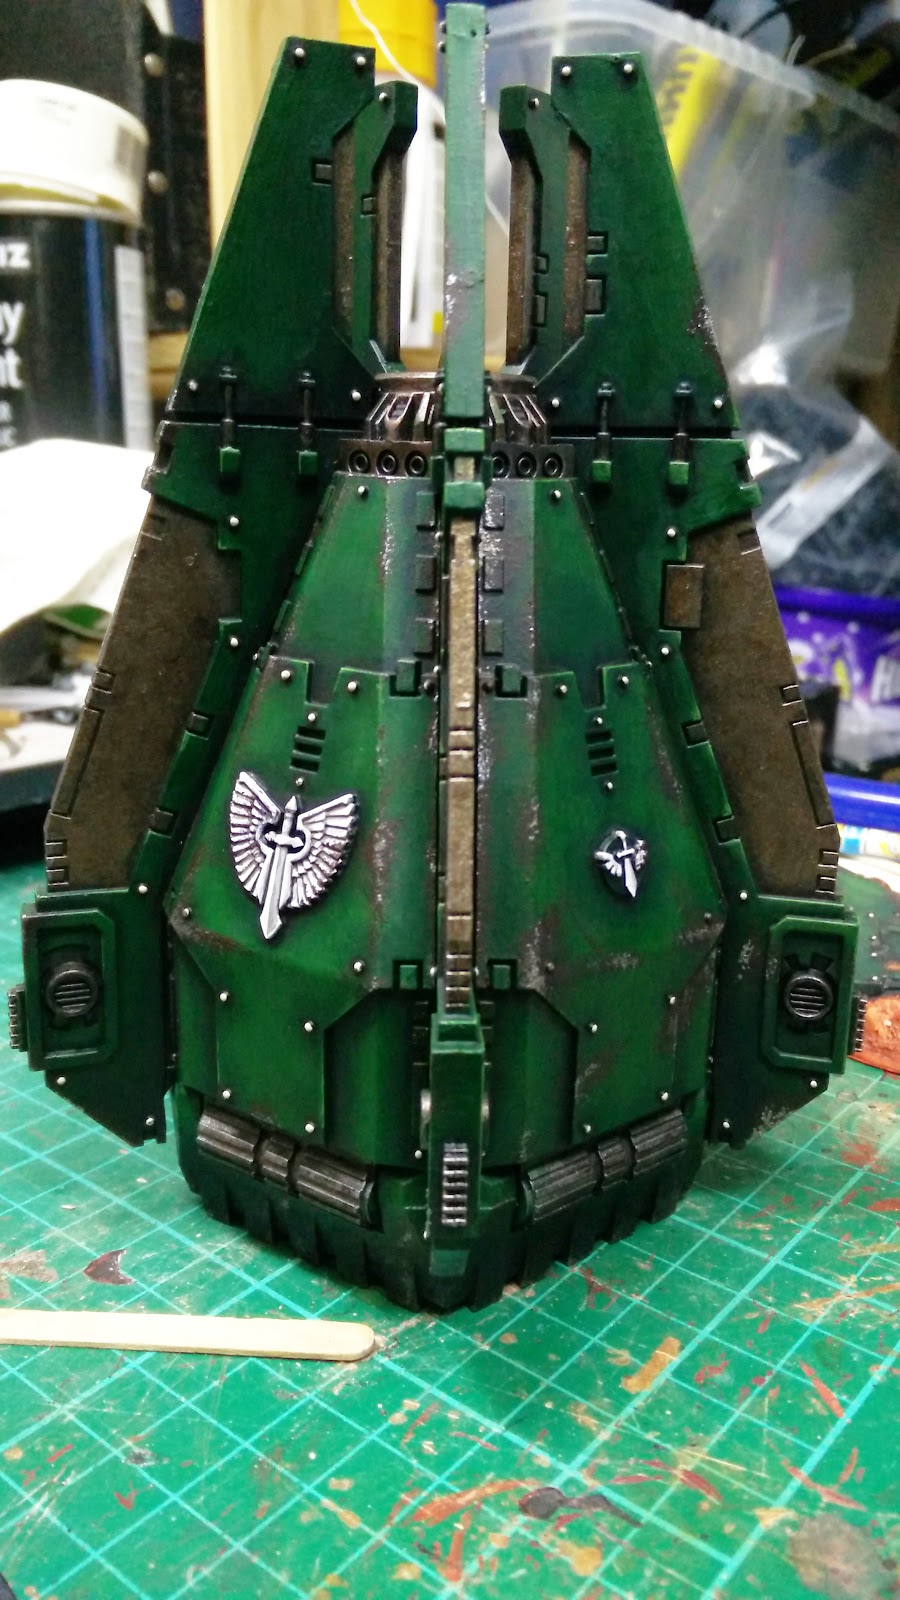
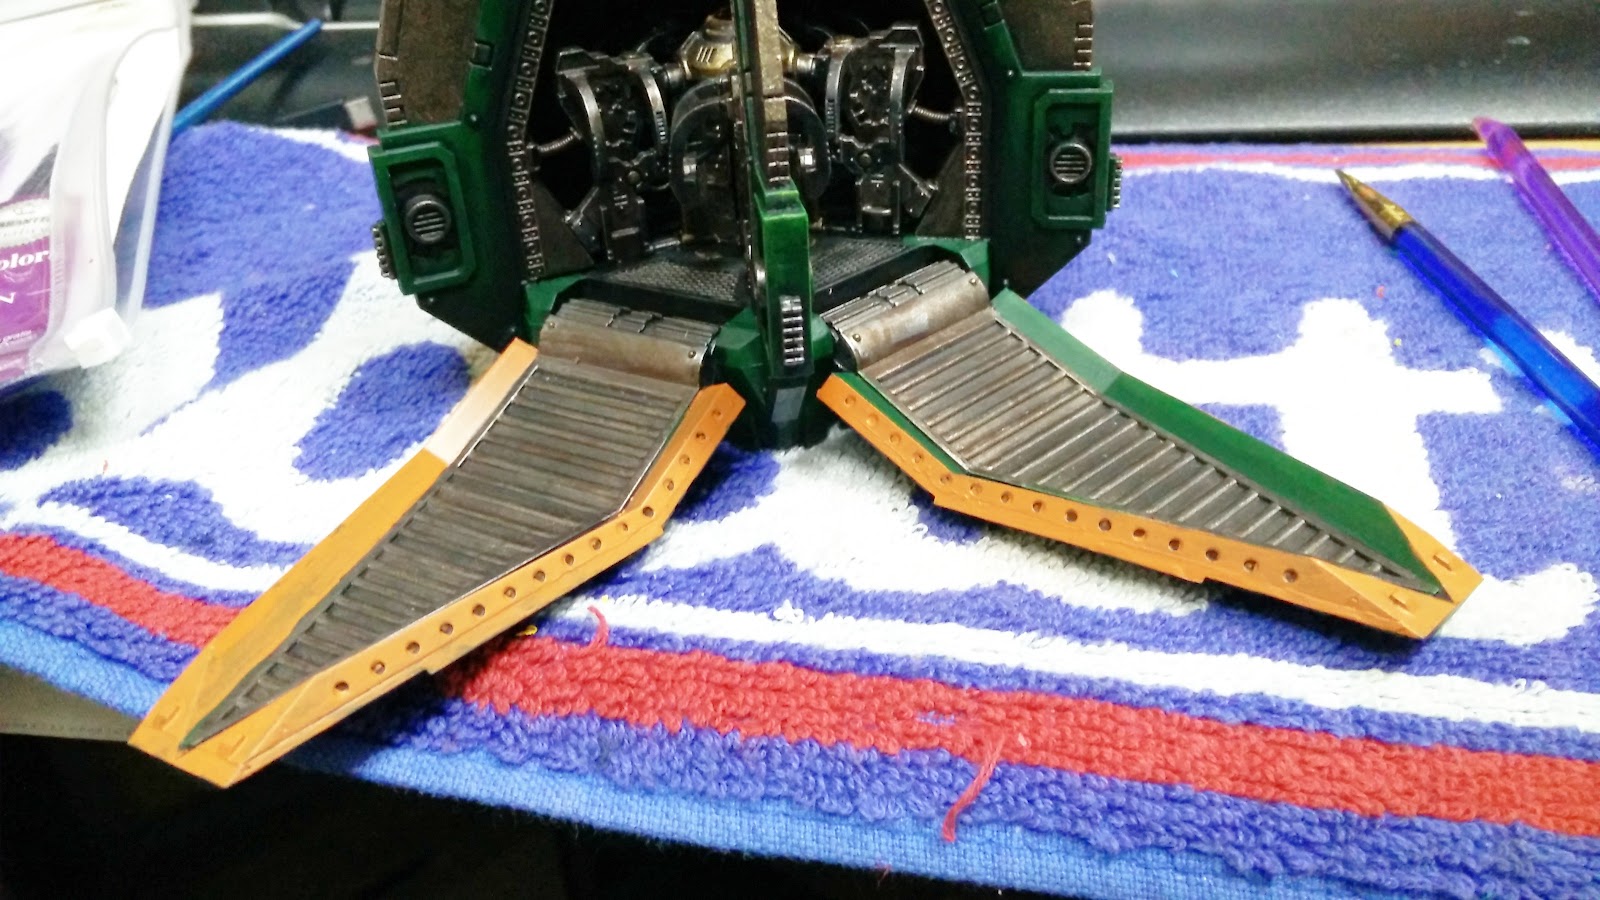
Here you can see the doors open and how the sepia wash on the door edges blended the oranges together. Compared with the piece of the crashed Aquila you can also see that the orange almost looks like my Ferron Proxima Red Planet Basing, unsurprising given the similar colours and yet unintentional. However, the result is most welcome and once again ties things together.


The fact is the pods, Aquila Lander and Euronymous run a fine line between process, effect and consistency. There have been slight deviations in process - choices in green and weathering that are completely different. The effects and how they’re consistent across the army was always a concern, not helped by the pod being started before I went all Verdigris Bronze on everything. And yet the inconsistencies are still valid as in reality not all materials are made at the same time so there will be differences in colours, some armour will be scuffed and reveal an undercoat, some will reveal bare metal. Some metals will be steel, some will be bronze etc.

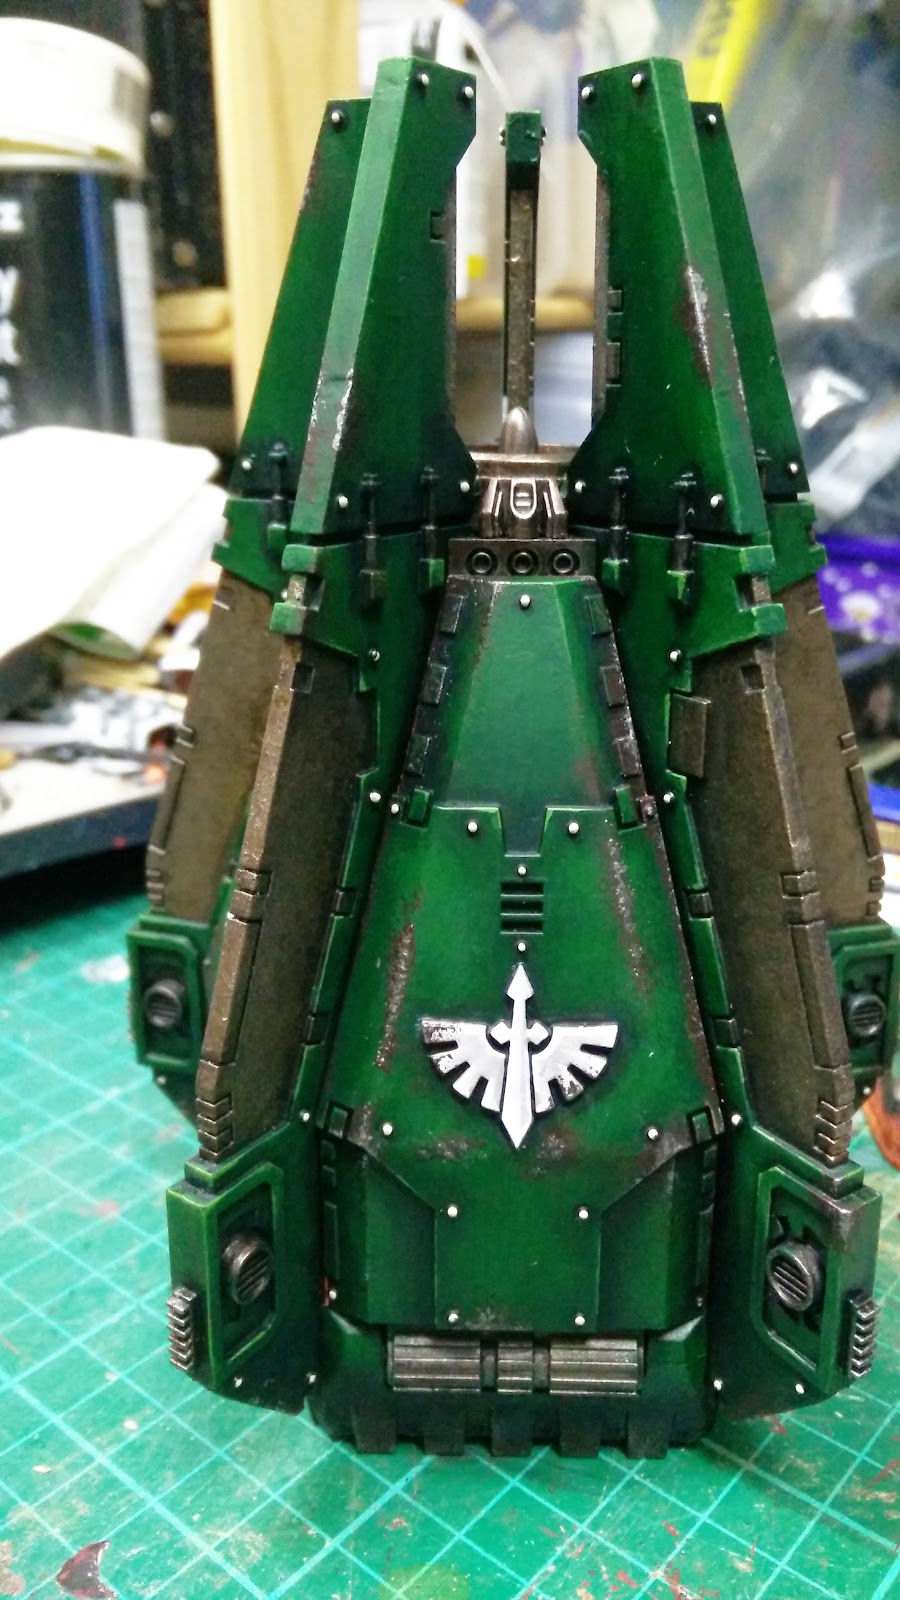
I think 100% colour matching is really effective and I’d love to have that but for the most part my nids deliver on this front. As much as I’d be happier for the Dark Angels, who I consider rightly or wrongly, to be the army I put more effort into; they’re also the army I agonise over more intensely so I have to take success where I can find it. There’s little left to do on this, I considered litany markings before the damage but wanted it left without extra paint breaking up the strong green. There are some yellow pipes inside that I also don’t think should be black and yellow striped. They’re so small breaking them up with black would disturb their ‘silhouette’ in the model. There's quite a few more details I could pick out but I need to remind myself this is just a pod, I’ve another one to do and this is pretty much better than I expected anyways. So, it just needs varnishing and some of the dials/radar need Tamiya Clear Orange X-26 and it’s done…

Friday 27 January 2017

Dark Angels - Drop Pod[s], no seriously!

One of the reasons why the drop pod was put to one side involved the doors. The standard is usually to put yellow and black chevrons done the side/inside and although I love a good chevron [yellow and black in particular] this was never what I wanted. Orange was my plan but having put the orange down the side I panicked and tried it inside as well. When I say panicked I mean I had a thought to photograph it and then Photoshop the extra orange on the inside and ask everyone's opinion but when I cam to do a successive coat of orange I just started painting the inside regardless [covering up the blended green I'd painstakingly done already].


But you see this was the inspiration for the orange [although they also did it in BR Green and yellow] so in some respects the original plan of just the side of the door was the right one.


So with the Aberrants out of the way and the Primus and Magus running out of steam it was time to look back at the pods. First step was to take a slightly different Craft Acrylic orange and run it along the bottom of the strip. I thought this would make it shade from bottom to top as my Valejo Fiery Orange was going to be on the edge. Then I carefully filled in all the 150 holes that are for the explosive bolts holding the doors shut.


But the intention was always to show the scorch residue from the bolts and the subsequent 'splotches' just didn't sit right and I was contemplating repainting the orange again [which had taken about 4 coats to get this far] and redoing the holes neatly.


I have a rule that if something doesn't look right then it usually isn't and as much as I wanted to show scorching what I had created was just 'untidy', like I'd tried to be neat but failed abysmally. You can also see the 'darker' orange didn't look darker, but more a hue shift so I was becoming frustrated and very early in the process of trying to finish this for good.


One last hope was to apply some silve to the edges, just to try and convince the viewer the scorch was intentional. Realism potentially out of the window, how do you get exposed metal and soot damage at the same time [you probably can but it didn't seem right in my head]? 


But the result was pretty OK and I thought it was good enough to save me from resetting the edges, both bad for progress and morale.


I also added some washes to the edge, not as apparent in the pics as it's ended up. Sepia all over and some Nuln Oil on all the holes to try and blend that 'soot'. Grunging it up saved it completely and you'll see how good it's become, blending the two orange hues together.


So I'm now really pleased with the result, it may not be the crisp clean orange of the Aston but the end result is something so much more and much mor ein keeping with what I've done in the army already. With this hurdle over it was full steam ahead and it looks like it's almost the home straight.

Wednesday 25 January 2017

'nids part 208 - Genestealer cult - Aberrants et al progress - skintone 2

It would seem the Genestealer Cult has applied it's insidious nature into my painting schedule, much as they do in the Imperium. it would seem they're my priority, despite having no urgency or relevance with what I need painting at the moment. In fact the Drop Pods could be used in my Birthday Bash list so really should move back to the fore. Anyway, I decided to work on the blue Aberrant, it's not really apparent in the pic but there is a subtle difference between his skintone and the Chitin spines, hopefully some red washes between the joins will make it stand out more.


I also did the spines and plates on the 4th Aberrant and some other bits.


The reason I didn't progress much further was because I had started doing the blue on the robes of the Magus, then did all the blue bits on these 3rd/4th gen hybrids. I also broke them down into groups so I could get a mix of diversity in skintone. It really just gives me the opportunity to play and try different things. With duplicates of the same pose it also helps them look a little different between the groups.


I then followed up with the rest of the Chitin highlights on the Patriarch. If I'm honest I thought this was a bit of a mess, not up to my usual standard.


Maybe it needs a little bit of extra highlights, or it could be just the image enhancement but the striations don't stand out, I may add a third extreme highlight in places.


The only other casualty of this enterprise is the tidiness of the man cave, when you're doing so many different  aspects paint pots get scattered everywhere, still 'progress is progress' as the Free Radical Collective espouse.

Monday 23 January 2017

SPORTS FANS - It's Wednesday Night Blood Bowl

First game of the year and it's actually first game of the season and my first ever game of new edition Blood Bowl. I say 'new edition', anything past 2nd edition is new to me. So here's some good old ES Posthumous to start the ball rolling.


PeteB and I began by trying to figure out the rules, which involved me saying 'an Action' a LOT of times. So we just set up the board, he was Orcs, I was the Humans.


Worth remembering when you play Blood Bowl - bring a ball! I was forced to use a Space Wolf 'severed' head as a proxy. Still, probably better use of it than as an army! ooh, the kick goes wide.


The Orcs bundle over to the side and is recovered by a lineman. Meanwhile in the centre of the field Blockers are failing to put down even a human catcher who just dances out of the way putting the Orc on the floor. In response one of the Marauder Blitzers puts an Orc in the hospital - that's painted miniature for you. Te rest of the team seeks to cover the left wing and the ball is fumbled. It scatters through the pack and ends up the Orc Thrower's hands.


Usain Bolt like footwork gets me a Catcher in the end zone. Logan the Linebacker blitzes the Orc Thrower with the ball falling loose diagonally right behind him.


One of my Throwers scoops up the ball and I was convinced you can't pick up a ball, move and pass in one turn. Pete was insistent it should be feasible, even to the point where we played out what would happen - perfect pass, catch and score. But I said it wasn't we reset and my Thrower got sacked.


The ball continued to bounce around the Orcs and I tried to pick it up but with so many Tackle Zones my Catcher just couldn't do it.


With only two turns left in the half Pete tried a long pass from downfield, his Blitzer ready to make an uncontested break for my end zone. But the Thrower fumbled, dropping the ball behind him!


Some surgical blocks and blitzes managed to put down any Orc interference allowing my Thrower to pick up the ball safely. We'd now found out you can move, pick up and throw! With my catcher flat out on the floor it was up to Logan the Linebacker to head for the end zone.


Luckily I got a reroll on my throw, thanks to skillz and it came in on target. Then Logan went to catch, failed but another re-roll made it a perfect catch to secure the game.


We had a great time, my most painted/decorated Blitzer got injured, alongside another player. Another Orc got Knocked Out by fans having been bundled into touch. There were some elements we weren't 100% happy with, it seems really difficult to put people down sometimes, thanks to Dodge and Orc Blockers not having the Block skill?! But we had fun and Pete is looking to repurpose some Khorne daemons and warriors as a team.

On top of that I came away with a name for my Ork team - da Pitch Shiftaz! Now I'm enthused, oh yeah!